If your device is already rooted your device and now you want to install SuperSu this won’t take much your time at all. You just need to download and install SuperSU from the Google Play Store. And that’s it. But sometimes there may be some problems but do not be afraid, we will help you to deal with su binary occupied problem!

SuperSU Root
SuperSU Root, in essence, is a gateway to the heart of your Android device. It empowers you with superuser access control, providing advanced management capabilities for rooted Android devices. Like any formidable tool, SuperSU Root has its set of pros and cons that you should be aware of.
Pros of using SuperSU Root
- User-Friendly Interface: SuperSU boasts an intuitive, user-friendly interface that simplifies the management of root settings. With just a single click, you can delve into the depths of your Android’s capabilities.
- Cost-Efficiency: The SuperSU root zip file is available for free, ensuring that you can enhance your Android experience without breaking the bank.
- Effortless Installation: Flashing SuperSU is a breeze. It takes just one click to initiate the process, making it accessible even for those new to Android customization.
Also read: What Is Google Temporary Hold On Credit Card
Cons of using SuperSU Root
- TWRP Dependency: To utilize SuperSU, you must first install the Team Win Recovery Project (TWRP) recovery environment on your device. This adds an extra step to the process.
- Root Knowledge Required: While SuperSU simplifies the user experience, you still need a basic understanding of how to navigate root settings to make the most of it.
What is SuperSU?
First of all, if not all know what is SuperSU we have a short explanation. SuperSU is a great application that lets you manage root permissions for apps that require root access on your smartphone. There are tons of apps that require root access to work on your device so SuperSU will help you to do this.
With SuperSU you have full control of all APPS with need root access.
Also read: Douchebag Workout 2 Cheats List
What to do if you got a problem called – SU Binary Occupied.
SU binary occupied is a message that can appear when trying to grant root access to an app on an Android device. The SU binary is a file that is used to grant root access to apps on the device, and the “occupied” error message indicates that the SU binary is currently being used by another app. This can happen if you have multiple apps that require root access, and they are trying to use the SU binary at the same time.
To fix this issue, you can try the following steps:
- Restart your device: This can sometimes resolve conflicts with the SU binary and allow the app to gain root access.
- Uninstall any recently-installed apps: If you have installed any new apps that require root access, they may be conflicting with the app that is trying to use the SU binary. Uninstalling these apps can sometimes fix the issue.
- Use a different root management app: There are many different root management apps available for Android, and some of them may be able to grant root access to the app without encountering the “occupied” error message.
If these steps don’t work, you may need to contact the app developer for further assistance. They can provide more specific advice on how to fix the issue with the SU binary on your device.
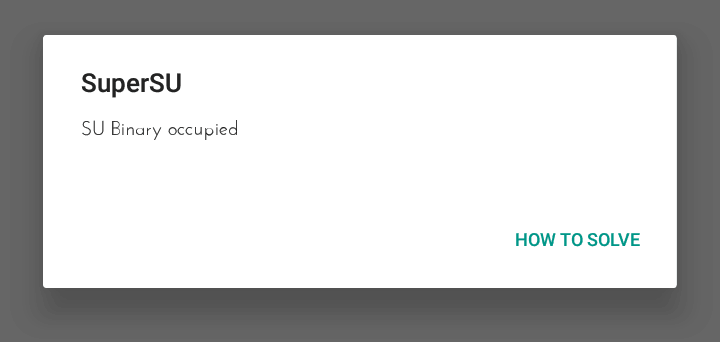
Now if for any reason you have an error which says “SU Binary Occupied”, don’t worry. There is a quick fix for these small troubles. Supersu binary occupied error can happen in anyways. For example, if yesterday it worked well for you, but you tried to update binaries using TRWP, for example, any other app and now you have SU Binary Occupied error. Do not worry we know how to fix this irritating problem.
Also read: What Is Chocoeukor
SU Binary Occupied – fix
Just follow these steps below:
1. First, you must go to SuperSU’s official website.
2. Find and download the previous version of the APK file on your phone. Refer to the Screenshot.
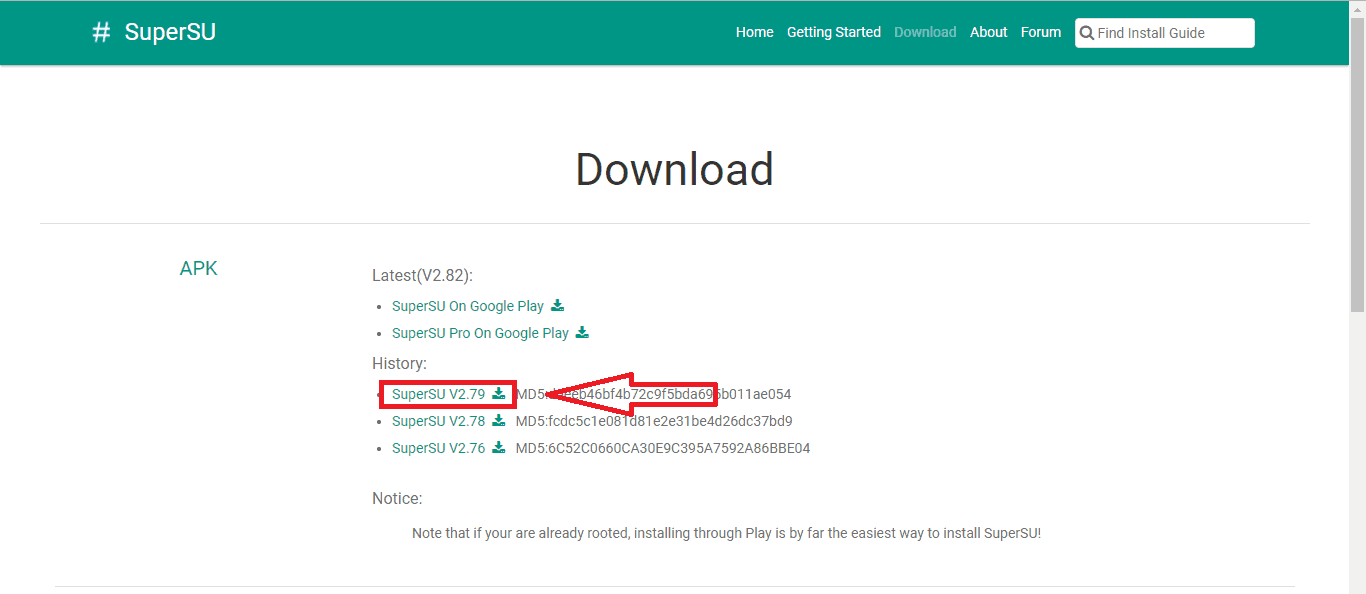
3. Install the selected APK file.
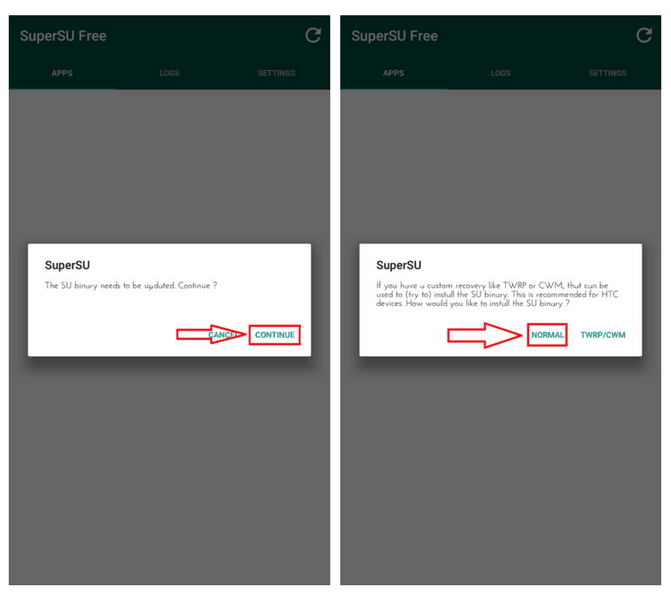
4. Once installed, launch the app. A Dialog box will open up saying, “SU Binary needs to be updated”. Tap on Continue and then tap on Normal.
Also read: do airtags need to be charged
6. After your device is up, navigate to the Google Play Store and check for updates. Update the SuperSU app to the latest version.
Also read: What Is Com.lge.launcher3
Even after updating to the latest version, the app might prompt you to update the SU Binary. Just follow the steps and reboot your device. And it will be done. You have fixed this small SU Binary Occupied problem.
How to Use SuperSU Root to Root Android
Now that you understand the advantages and limitations of SuperSU Root, let’s dive into the process of using it to root your Android device. Follow these straightforward steps to unlock your Android’s full potential:
Step 1: Install TWRP Recovery
- Visit the official TWRP website to download the appropriate TWRP recovery environment for your specific device model.
- Once downloaded, transfer the TWRP recovery file to your Android device.
- Access the TWRP recovery environment by booting your device into recovery mode. The button combination required for this varies by device, so a quick online search for “TWRP (Your Device Model)” should yield the necessary information.
- In the TWRP recovery screen, tap “Install” to initiate the installation process.
Step 2: Download SuperSU Root
- On your phone or computer browser, visit the official SuperSU Root website.
- Download the SuperSU zip file. If you’ve downloaded it on your computer, transfer it to your Android device.
Step 3: Flash SuperSU
- In the TWRP recovery environment, you’ll find the option to install the SuperSU zip file you downloaded. Select it.
- Confirm the flash by swiping the “Swipe to confirm flash” slider.
- The installation duration may vary, so exercise patience. Once SuperSU is installed, tap “Wipe cache/Dalvik.”
- Finally, select “Reboot System” to complete the operation.
With these steps completed, you should now see the SuperSU app on your device. To verify the success of the rooting procedure, consider installing an app that requires root access, such as “Greenify” or “Titanium Backup.” When you attempt to use one of these apps, a pop-up requesting Superuser access should appear. Simply tap “Grant,” and upon seeing the “Success” message, your Android device has been successfully rooted.
Unlock the full potential of your Android device with SuperSU Root, and embark on a journey of customization and control like never before. Make the most of your Android experience by harnessing the power that SuperSU Root puts at your fingertips.
Frequently Asked Questions
- What is SuperSU Root, and why is it important for Android users?
- SuperSU Root is a tool that grants superuser access on rooted Android devices. It’s essential for users who want to customize their Android experience and access advanced settings.
- Is SuperSU Root compatible with all Android devices?
- SuperSU Root is compatible with a wide range of Android devices, but it’s essential to check for specific compatibility for your device model.
- Are there any risks associated with rooting an Android device using SuperSU Root?
- Rooting your Android device with SuperSU Root can void warranties and potentially lead to security vulnerabilities if not done correctly. It’s crucial to follow instructions carefully.
- Can I unroot my Android device after using SuperSU Root?
- Yes, you can unroot your device using the SuperSU app. Simply open the app, go to the settings, and choose the option to unroot your device.
- What are some popular apps that require root access on Android?
- Popular apps that benefit from root access include Greenify, Titanium Backup, and AdAway.
- Is it possible to update Android after rooting with SuperSU Root?
- Yes, you can update your Android device after rooting with SuperSU Root, but you should be cautious and follow specific instructions to preserve root access.
- What are the potential benefits of rooting an Android device?
- Rooting allows for custom ROM installation, increased performance, bloatware removal, and the ability to use root-dependent apps.
- Can rooting an Android device cause it to become unstable or lead to data loss?
- Improper rooting procedures or customizations can potentially lead to device instability or data loss. It’s crucial to proceed with caution and back up your data.
- Are there alternatives to SuperSU Root for rooting Android devices?
- Yes, there are alternative root management tools, such as Magisk, that offer similar functionality to SuperSU Root.
- Does rooting an Android device void its warranty?
- Rooting can void your device’s warranty, so it’s essential to check your manufacturer’s policy and understand the risks before proceeding.
Supersu
SuperSU is a popular root management app for Android devices. It allows users to gain root access to their device, giving them more control and flexibility over their Android system. With SuperSU, users can grant or deny root access to specific apps, ensuring better security and control over their device.
Installing SuperSU is a straightforward process. Users can download the SuperSU zip file from the official website or from trusted sources. Once downloaded, they can flash the zip file through a custom recovery like TWRP or CWM. After the installation, SuperSU will be installed as a system app, allowing users to manage root access on their device.
One common issue that users may encounter when using SuperSU is the “SU binary occupied” error. This error message usually occurs when the SuperSU binary is already in use by another root management app or if the root access is denied for some reason. To fix this issue, users can try reinstalling SuperSU or granting root access to SuperSU from the Superuser app settings.
SuperSU offers a range of features and options for advanced users. It provides a log of root access requests, allowing users to review and manage app permissions. It also has a feature called “Survival mode,” which ensures that SuperSU remains installed even after a system update. SuperSU is a powerful tool for Android enthusiasts who want to make the most out of their rooted device.
Su binary
SU Binary: What is it?
The SU Binary is a component of SuperSU, which is a popular rooting tool for Android devices. It is responsible for managing the root access on your device, allowing you to grant or deny root permissions to apps and system processes.
Why is SU Binary important?
The SU Binary is essential for the proper functioning of SuperSU and any other app that requires root access. Without the SU Binary, you won’t be able to manage root permissions, and certain apps or features that rely on root access may not work correctly.
What does it mean when SU Binary is occupied?
If you encounter the error message “SU Binary Occupied” while using SuperSU, it means that another app or process is using the SU Binary, preventing SuperSU from accessing it. This can happen when multiple root management apps are installed on your device or if a system process is holding the binary.
How to fix the “SU Binary Occupied” issue?
To fix the “SU Binary Occupied” issue, you can try the following solutions:
- Reboot your device: Sometimes, a simple reboot can free up the SU Binary and resolve the issue.
- Uninstall conflicting apps: If you have multiple root management apps installed, uninstalling them can help resolve the conflict and free up the SU Binary.
- Use a root access management tool: You can use alternative root access management tools like Magisk or KingRoot to manage root permissions if SuperSU is unable to access the SU Binary.
- Reinstall SuperSU: If all else fails, you can try reinstalling SuperSU to ensure that the SU Binary is properly installed and accessible.