SuperSU is an application which enables you to handle root permissions for apps which require root access. There are a lot of apps which require root access so as to work at their full potential. What SuperSu does is that whenever a program requires root access, it first asks for your permission, whether you want to allow that particular app to have root access or not. This way, you have total control over the main access permission of all of the apps.
Pros of using SuperSU Root
- SuperSu is quite easy to use, granting user-access to rooted settings in a single click.
- The SuperSU root zip file is free to download.
- Flashing SuperSU can be done with a single click.
Cons of using SuperSU Root
- You have to install TWRP to use SuperSU.
- You have to have knowledge of how to navigate root settings to use SuperSU.
How to install SuperSU?
In case you have a rooted device, installing SuperSU is a piece of a cake.
Those of you who have not yet rooted their device can also install SuperSU but through custom recovery like TWRP or CWM. That means you need to have TWRP or CWM Recovery installed on your device. Otherwise, it won’t be possible for you to go ahead with SuperSU.
Installation guide for Rooted Devices:
For rooted Android, installing SuperSU won’t take more than a couple of minutes.
1. Download and Install SuperSU from the Google Play Store.
Now if for any reason you see an error which says “SU Binary Occupied”, don’t worry. There’s a solution for this too.
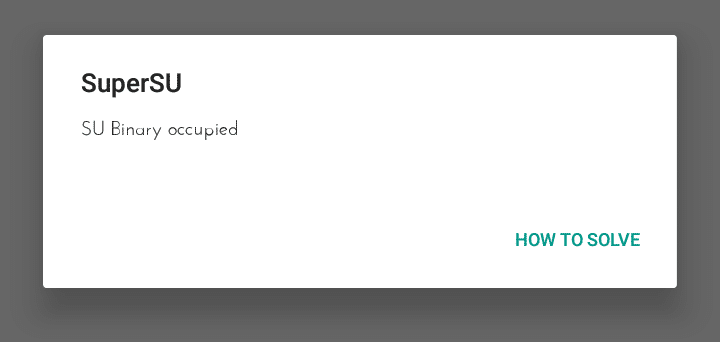
Follow these steps:
1. Head over to SuperSU’s official website.
2. Download the previous version of the APK file on your phone. Refer the Screenshot.
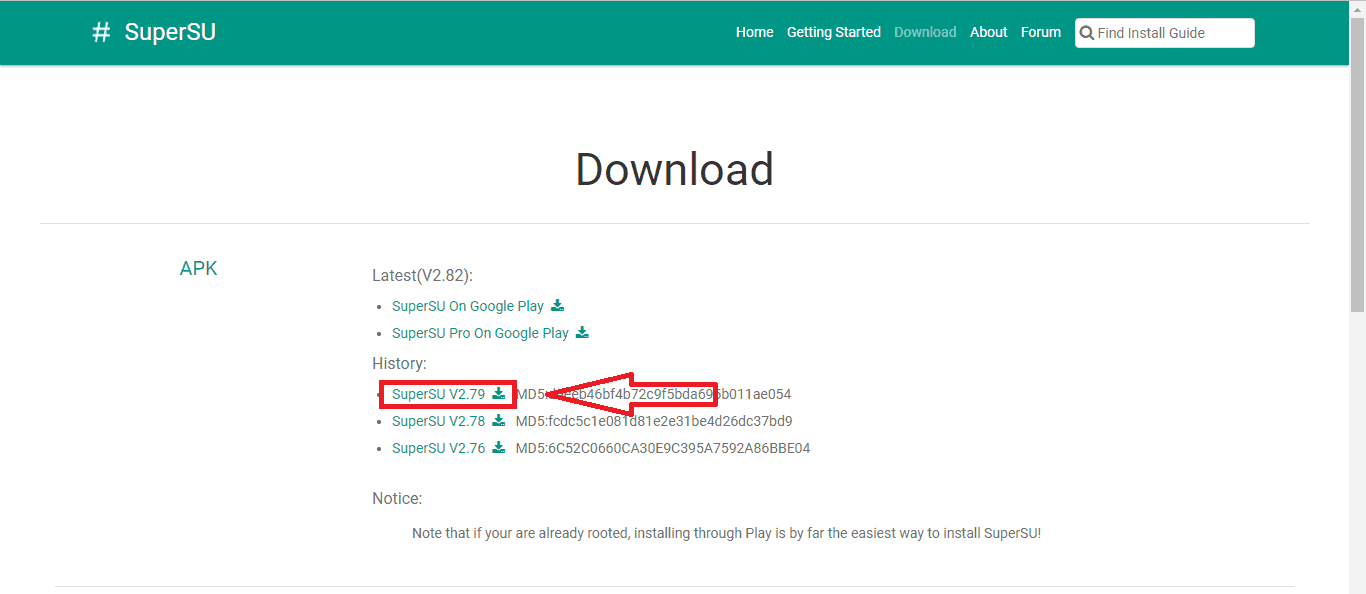
3. Install the APK file.
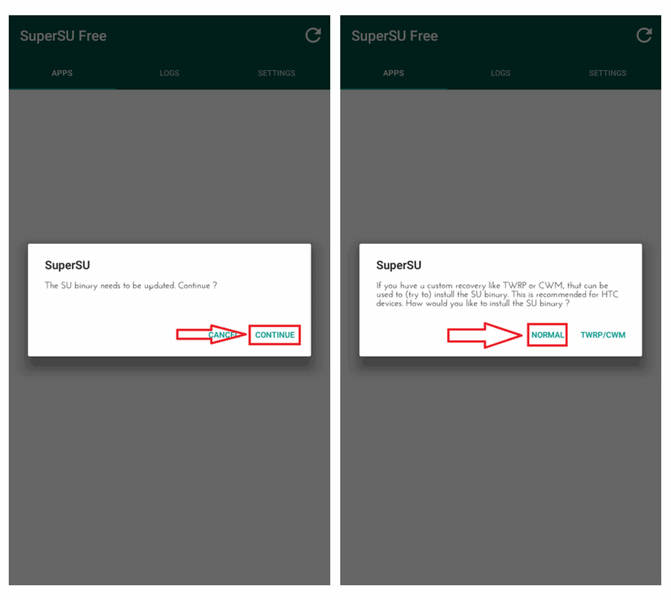
4. Once installed, Launch the app. A Dialog box will open up saying, “SU Binary needs to be updated”. Tap on Continue and then tap on Normal.
5. It will take a couple of minutes to install the updates. Reboot your device.
6. After your device is up, navigate to the Google Play Store and check for updates. Update the SuperSU app to the latest version.
Even after updating to the latest version, the app might prompt you to update the SU Binary. Just follow the steps and reboot your device. And it will be done.
Installation Guide for Devices without Root
Note: You need to have TWRP or CWM Recovery, only then this method will work.
It is recommended that you backup your files first before proceeding with the following steps.
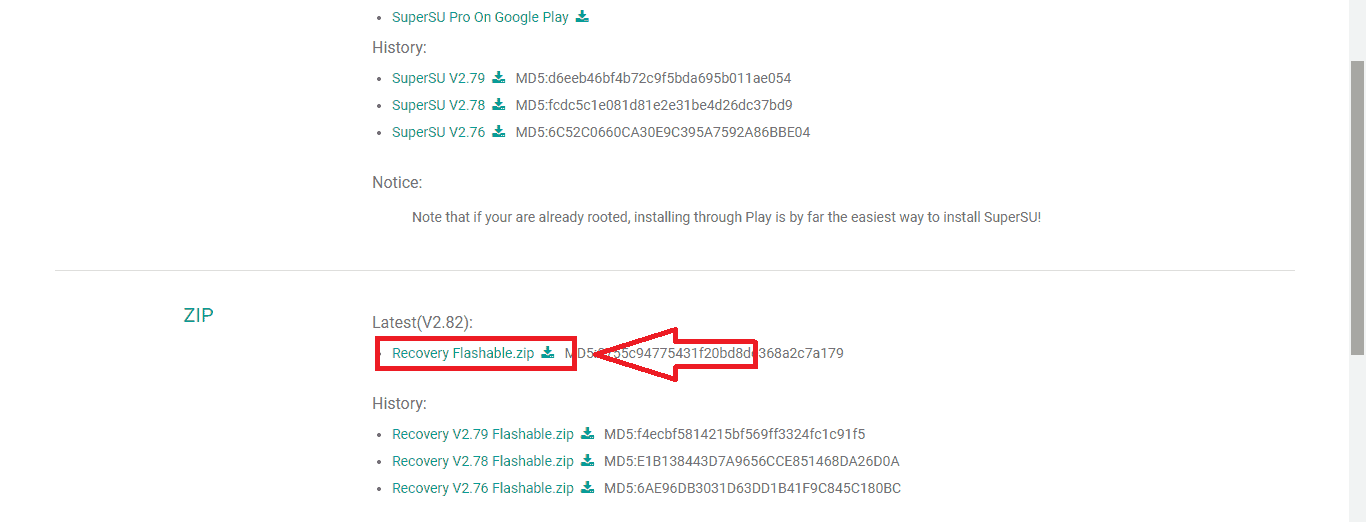
1. Head over to SuperSU’s official website and download the latest SuperSU zip file on your device.
2. Move the downloaded zip file to the root of your internal storage.
3. Power off your device and reboot into recovery mode by pressing Power and Volume Down button simultaneously for a few seconds.
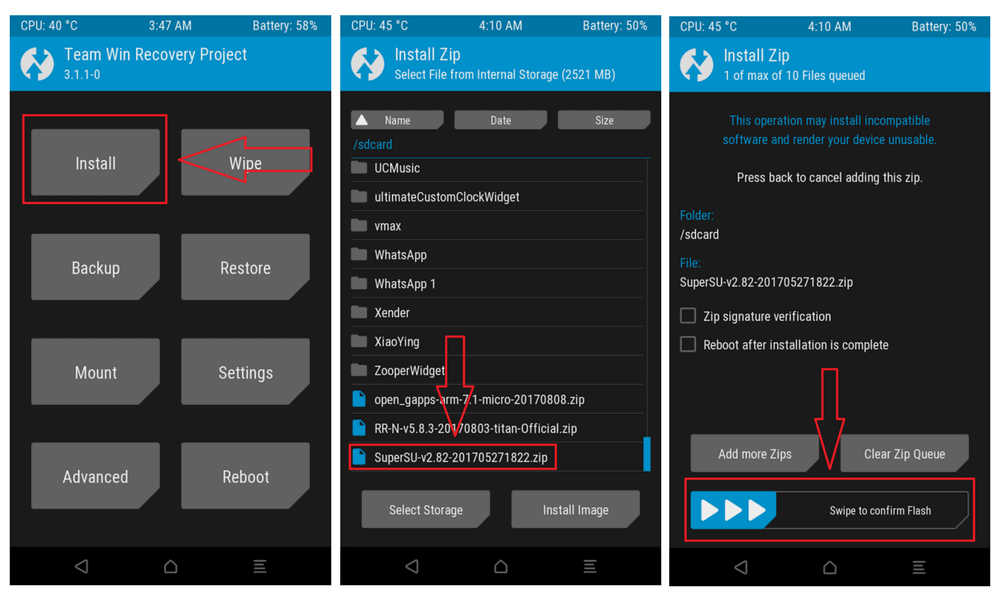
4. Tap on Install.
5. Find the SuperSU zip file. Remember that in TWRP internal storage is called as sdcard and the external storage is called as sdcard1.
If you’ve moved the SuperSU zip file to the root of Internal Storage then you will find the zip file under sdcard.
6. Select the zip file and Swipe to Confirm Flash.
7. Tap on Wipe Cache & Dalvik and swipe to wipe.
8. Reboot.
TWRP may tell you to install the SuperSU app. Tap on Do not Install. That’s because TWRP fails to recognize whether you have SuperSU installed or not.
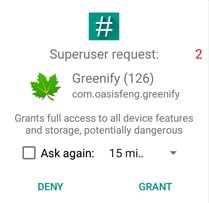
That completes the process and you should now see the SuperSU app on your device. You can test the success of the rooting procedure by installing an app that requires root access. A good example is “Greenify” or “Titanium Backup” When attempting to use one of these apps, a popup should appear requesting Superuser access. Tap “Grant” and when you see a “Success” message, the device has been successfully rooted.