TWRP is a tool for anybody that enjoys modifying their Android device. TWRP has been around since the invention of the wheel back in 1996 and has been providing all kinds of tools that are great to Android community modders. TWRP is one of the best and most used recovery applications for Android users. It is widely known recovery software throughout the world since it does not require to ROOT the device. Here is the full guideline for installing TWRP on any Android device.
The majority of Android phone users are interested in customizing their devices with advanced ROMs, and mods. Such interested users must install a personalized recovery prior to additional customization. This tutorial will serve a guide to understand where the newest TWRP recovery version is available for the devices, how to download and install TWRP recovery on your smartphone.
What is TWRP?
TWRP (TeamWin Recovery Project) is actually a third-party and the first touch-enabled custom recovery for the Android devices which allows the users to install the third-party software including the custom ROMs, kernels, and mods. Also, it enables a user to wipe/flash the device partitions as well as to backup/restore the software.
Dee’s Troy is now leading the project along with other developers responsible for maintaining the individual device support. Presently, TeamWin officially supports over 100 Android devices from various manufacturers. Individual developers are handling the unofficial ports/development for specific Android devices.
Also read: What is Pagebuddynotisvc
Download TWRP Recovery Image
In order to make your effort easy, we have attached the links to all the supported Android manufacturers. You may just need to click on your device’s manufacturer name and then download the TWRP recovery for your device.
- Alcatel
- Allview
- Amazon
- Amlogic
- Arcos
- Asus
- Barnes & Noble
- BQ
- Cat
- Dell
- Elephone
- Essential
- Fairphone
- HP
- HTC
- Huawei
- Infinix
- IUNI
- Kazam
- LeEco
- Lenovo
- Letv
- LG
- Marshall
- Mattel
- Micromax
- Minix
- Motorola
- Nextbit
- Nubia
- Nvidia
- Omate
- OnePlus
- Oppo
- Pantech
- Quanta
- Razer
- Samsung
- Silentcircle
- Sony
- Wileyfox
- Wingtech
- Xiaomi
- Yu
- ZTE
- ZUK
Once you are done with the downloading of the TWRP recovery for your respective Android device, you need to follow the instructions to install the recovery.
TWRP Functions
NANDroid Backup
Perform full system backups to hold onto just in case you screw something up on your phone. It’s always a good idea to backup before you flash any kind of ROM.
Restoring an Existing Backup
If you flash a ROM that you don’t like, or you’re experiencing some kind of bug in your software, restore from a known good backup.
Flash ZIP Files
If you’re installing a mod, flashing Gapps, or flashing a ROM, you’ll need the ability to flash ZIP files through your recovery.
Factory Reset
Sometimes you get stuck and you’re not able to boot into the Android OS. When this happens, you can try to boot into TWRP and perform a factory reset.
Fix Permissions
When you’re flashing ROMs, sometimes your system can forget which permissions were granted to different apps. Fixing permissions will set everything back to the way you had them.
Also read: Mi Stock Recovery
How to Install TWRP Recovery?
We will give you two ways to install TWRP recovery on your Android devices. In the first method, you will have to use the Fastboot to flash the recovery IMG file. The second method has to be followed by the Samsung Galaxy users where they will flash the recovery using the Odin tool.

Method 1: Flash TWRP Recovery using Fastboot
For this method, you need to have Unlocked Boot louder. If you didn’t do this you need to proceed this first:
How to Unlock Bootloader via Fastboot
- Setup ADB and Fastboot on your PC.
- Enable USB debugging and OEM Unlock on your Android device.
- Connect your device to the PC with a USB cable.
- Open a command window on your PC.
- Boot your device into bootloader mode using the following command:
adb reboot bootloader
└ You may get a request to authorize USB debugging on the device, accept it.
- Once your device is in bootloader mode, issue the following command to unlock bootloader:
fastboot flashing unlock
If the above command doesn’t work, run this command (older devices need this): fastboot oem unlock
- (Not applicable for all) If you get a confirmation screen on your device. Press Volume Up button to highlight Yes and press Power button to select it. This will begin the bootloader unlocking process, which shouldn’t last more than a couple of minutes.
- Once the bootloader is unlocked, your device will reboot into bootloader mode. You need to boot it into the system now using the command below:
fastboot reboot
- During the reboot, your device will go through a factory reset and then finally boot into the system.
Also read: Unified Daemon
That’s all. Your Android device’s bootloader is now unlocked now you can proceed to TWRP:
- Download TWRP recovery image (*.img) for your Android device.
- Now copy this image file to C:\adb folder where the ADB/Fastboot binaries will be present.
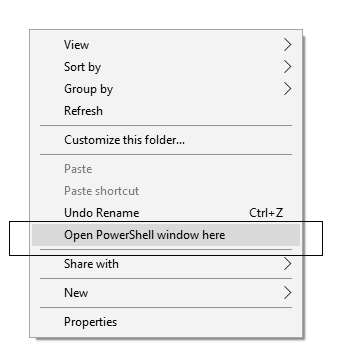
- Press and hold the SHIFT key and do a right-click on an empty space inside the folder.
- You should Select ‘Open PowerShell window here’.
- Now Boot your Android phone into the Bootloader/Fastboot mode.
- Connect it to the PC with the help of the USB cable.
- Make sure that your device is being detected properly using the following command:
fastboot devices
- The command will return a unique device ID right with the ‘fastboot’ message.
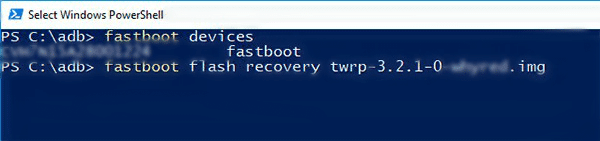
- Lastly, install TWRP recovery on the device using the following command:
fastboot flash recovery <recovery-image.img>
- Replace “<recovery-image.img>” with the real filename of the recovery image. Example:
fastboot flash recovery twrp-3.2.1-0-angler.img
- Android Devices with A/B partition system, such as the Google Pixel/Pixel 2, Moto Z2 Force, Mi A1, will not be supporting direct flashing. So you will need to temporarily boot TWRP for such devices using the following command:
fastboot boot <twrp-recovery.img>
- Replace “<twrp-recovery.img>” with the exact filename. Example:
fastboot boot twrp-3.2.1-2-taimen.img

So this is how you can install TWRP recovery using Fastboot which will be working for the majority of OEM Android devices.
How you can take Backup in TWRP recovery mode
Launch TWRP recovery mode and tap on ‘Backup’ option. Thereafter, choose ‘Boot’, System and Data selection and then swipe the bar to initiate the backup.

Note: backup may take a few minutes to finish since it also depends on your device and device’s ROMs size
Method 2: Flash TWRP Recovery using Odin Tool
- Initially, download the TWRP recovery Odin flashable (*.img.tar) file for your Samsung device along with Odin tool and extract the ZIP on your PC.
- Head on to the extracted folder and then run the ‘Odin3.exe’ by doing a double-click on it.
- Now Boot your Samsung device into Download mode and then connect your device to the PC.
- You can see the COM port in the Odin window should lighten up.
- Now click on the ‘AP’ button.
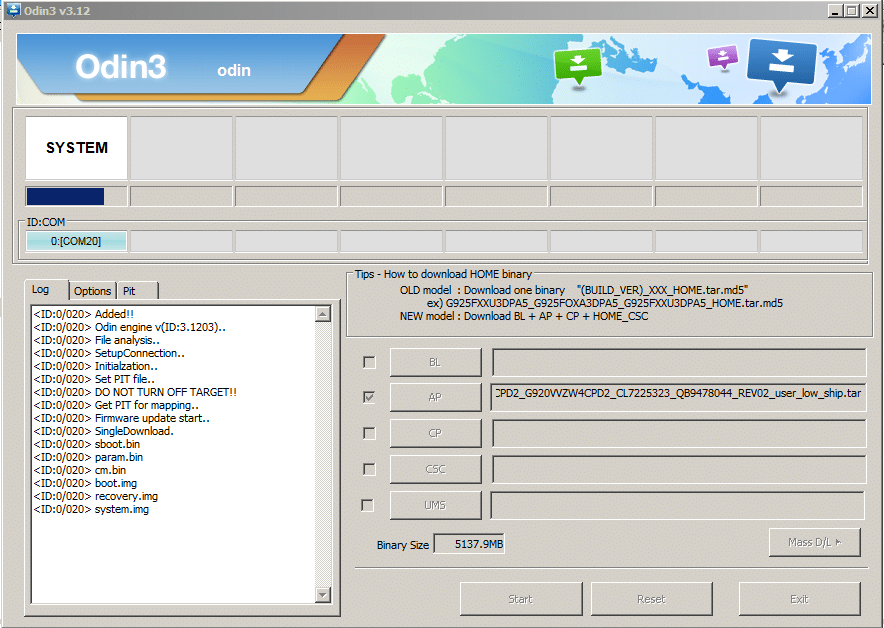
- Select the TWRP recovery tar file for your Samsung Galaxy device.
- Be sure that you don’t modify any other settings.
- Lastly, click on the ‘Start’ button to install TWRP recovery using Odin tool.

Once the flashing process is finished, you will see a ‘PASS!’ message on the device screen, and the phone will automatically reboot.
How to do an Update of TWRP Recovery?
- Initially, you need to download the latest TWRP version (.img) for your device.
- Now connect your phone to the computer using the USB cable.
- Copy the downloaded IMG file and move to the phone’s storage or SD card.
- Disconnect the device from the PC and power it off.
- Now Boot your Android device into TWRP recovery mode.
- Head to the ‘Install’ menu and tap on the ‘Install image’ button seen at the bottom.
- Select the TWRP IMG file there.
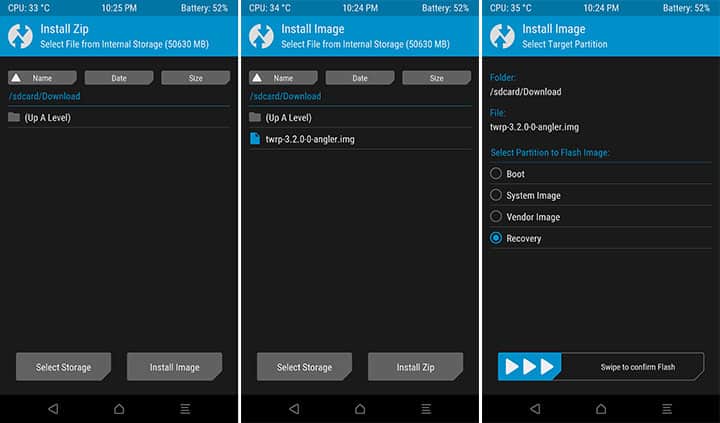
- Select the ‘Recovery’ from the list of partitions shown on the device screen.
- Lastly, swipe the button on the device screen to update the TWRP recovery to the latest available version.
- Once done with it, click on the ‘Reboot System’ icon.