If you’re using an older Kodi version (latest version as you may know is Kodi18.4 Leia) in your Fire TV / Stick, this guide is for you. I will demonstrate how you can upgrade Kodi on FireStick or Fire TV without using even a computer. The process is quite straightforward, however, you want to follow the steps carefully as mentioned in the manual so that you don’t encounter errors at a later stage. Updating Kodi in your fire stick is not as hard and complex as you may thing. Check here for a simple step-by-step guide to upgrade Kodi on Fire Stick.
How to Install (update) Kodi 17.3 FireStick
Also read: How to Install Vudu on Firestick
To update Kodi on FireStick devices, you need to repeat the process of installing Kodi on Firestick. So for this we need to:
- Using your FireStick / Fire TV, go to the Home screen by pressing the Home button on the Fire TV remote.
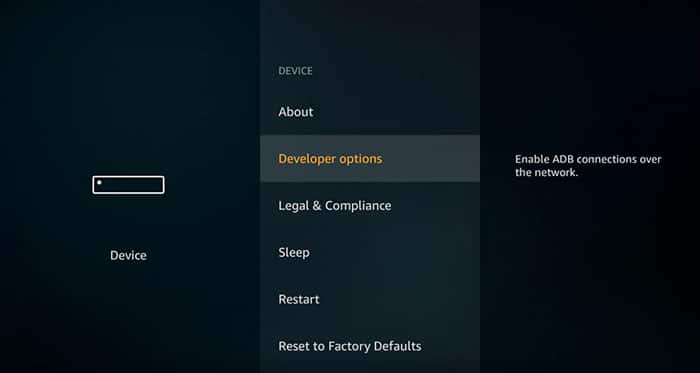
- Enable ADB Debugging on your Fire TV by going to the System / Settings area. Make sure ADB Debugging is Enabled and Apps From Unknown Sources are both enabled because Kodi requires that both of these are turned on to install.
- After these are enabled, return to the Fire TV home screen
- Go to Search
- Search for “Downloader“
- If you haven’t already done so, select the word “Downloader” to search for the Downloader app
- In the search results, select “Apps & Games” (for the updated version of Amazon Fire OS)
- Now select Download or Install or OK
- Wait a few seconds for the Kodi Downloader app to install
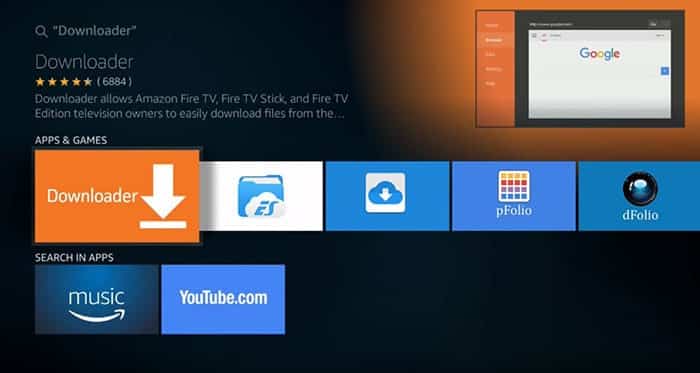
- Now select OPEN using the Fire TV Remote to launch the Downloader app
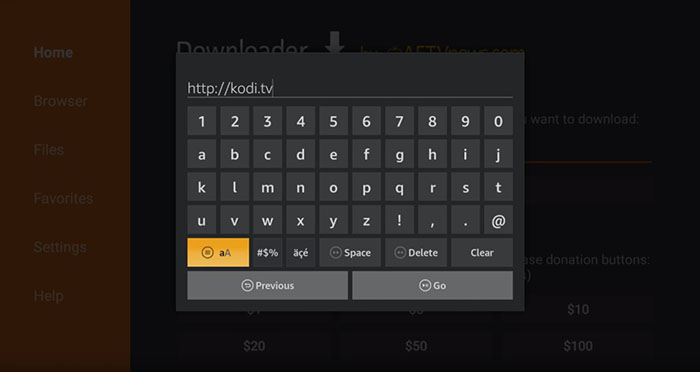
- In the Downloader app, Enter “http://kodi.tv” without the quotes.
- Once the website is fully loaded, scroll all the way down until you see different icons representing different platforms. Click on the Android logo. This will open the Downloads Section on Kodi’s official website;
- Once again, scroll down until you see the Android logo (little green robot). Click on it and you’ll be taken to a new page;
- Now find the blue-colored button that says ‘ARMV7A (32BIT)’. Wait a couple of seconds; You will see a new window with the progress bar. Wait for the download to be completed.
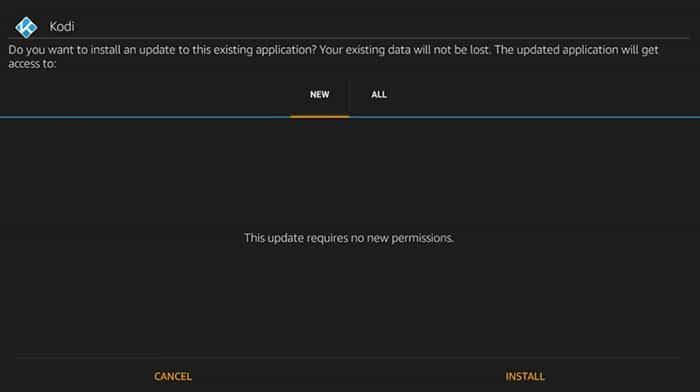
- Once Kodi’s downloads, you’ll immediately see a new installation window. You’ll recognize it by Kodi’s logo in the top-left corner; Press on ‘Install’ in the bottom-right corner;
- Once Kodi finishes installing, you’ll see a button that says ‘Open’ in the bottom-right corner.
- Wait for Kodi to install.
- After Kodi installs, select “Open App” or “Launch App” to launch Kodi for the first time. And this is it.


Also read: How to Enable Automatic Subtitles on Kodi
How to Install (update) Kodi 18.4 FireStick
The update process is the same as we mentioned for version Kodi 17.3, please follow the process and you will update Kodi for the latest version.