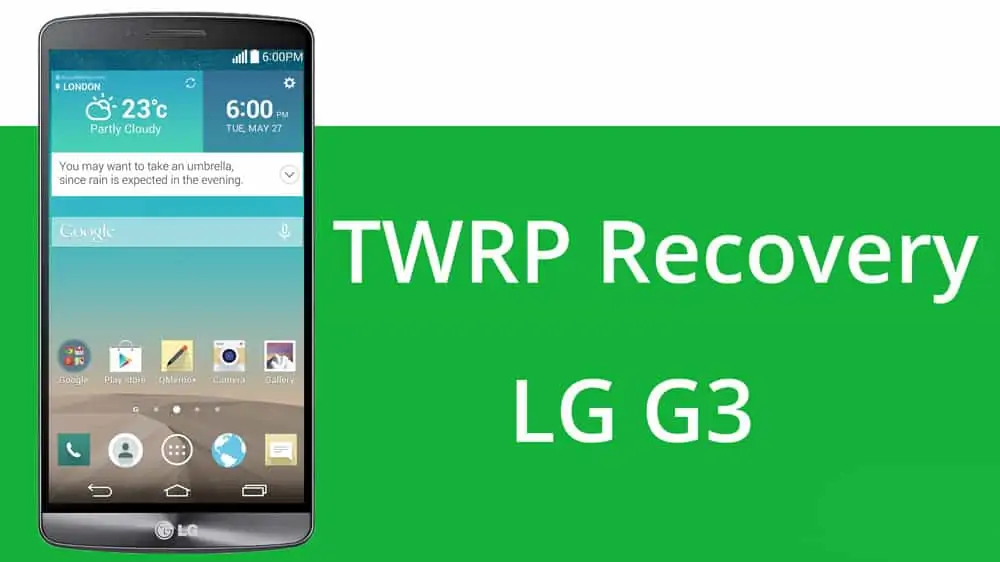
LG G3 is already a old phone, but still many people using it it has nice features a 5.5 inches True HD-IPS display, Qualcomm Snapdragon 801 Quad-core 2.5 GHz Krait 400 processor, Adreno 330 Graphics unit, 13 MP high-res Camera with 3 GB RAM for better performance and smooth user-interface. The device was released during May 2014, proving itself to be a strong contender against all other high-end flagships including Sony Xperia Z3, Oppo Find 7, Samsung Galaxy S5 and the HTC One M8.
The most popular custom Recovery for Android devices, TWRP has made its way to the LG G3. TWRP is considered as the best recovery as it features a full touch friendly user interface, themes and the ability to flash files without having to use fastboot.
Th recovery has made its way to the LG G3 and you can install it by following the guide below. With TWPP you can do many things that you cannot do with other recoveries, that’s why we always recommend TWRP on every ROM flashing article.
How to install TWRP custom Recovery on the LG G3
Preparations
Your LG G3 must be charged to 70% so the phone will not turn off during the process.
- Install LG G3 USB Drivers: Download here
- Setup Android SDK or use minimal ADB and Fastboot tool: mfastboot-v2.zip [Mirror]
- Enable USB Debugging on LG G3
- Backup your device completely. This includes Storage, SMS, Contacts, Calendars and everything else that is necessary
- Charge your G3 to at least 60% battery to avoid any uncertain shuts during the process
Download TWRP Image
All the Recovery flashable image files could be found here. Downloading and Installing the wrong file will break your device. Be careful!
Install TWRP Recovery and Unlock LG G3
- Download the recovery image corresponding to your device model number and copy the .img file to the internal storage of your LG G3.
- Connect your G3 to the PC via MTP mode and copy the downloaded image file to the root of Internal Storage.
- Open the platform-tools (if you have installed Android SDK) or mfastboot-v2 folder (if you have downloaded minimal fastboot tool from above). Press Shift key on your computer’s keyboard and right-click with the mouse on an empty space inside the folder. Then select Open command window here from the menu that pops up..
- Enter the commands below to complete the installation process, issue the commands given below and press Enter key after each.
- Type the following commands in the cmd window:
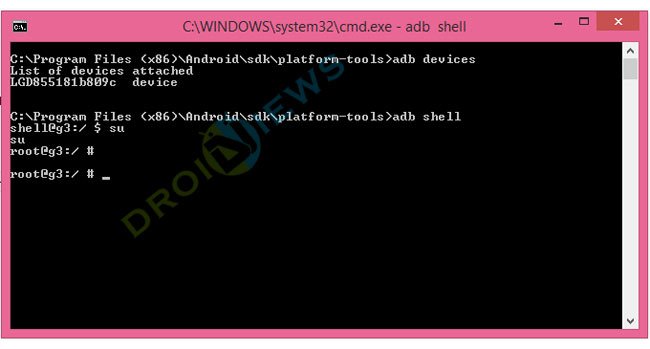
adb shell
su
- Make sure to grant SuperUser access on your device when requested
- If everything is fine, you will see a screen like this:
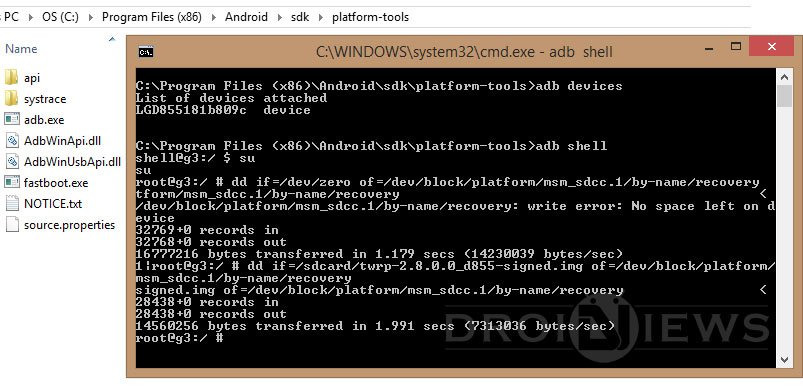
- Okay, it’s time now to install TWRP image on your G3. Just type or copy/paste (to avoid mistake) the following commands one by one.
Note: Make sure to rename model number (e.g d855/d852/LS990/VS985) with the model number corresponding to your downloaded image file.dd if=/dev/zero of=/dev/block/platform/msm_sdcc.1/by-name/recovery
dd if=/sdcard/twrp-2.8.0.0_d855-signed.img of=/dev/block/platform/msm_sdcc.1/by-name/recovery
- Your cmd window will look like this:
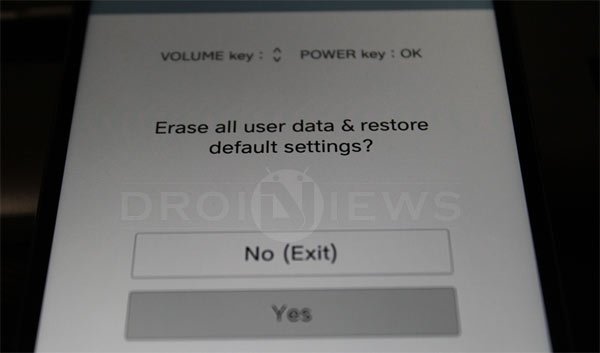
- Now turn off your G3 and disconnect the USB cable.
- Press Volume Down and Power keys together until you see the LG logo.
- Keep pressing the Volume Down key and release the Power button and press it back again.
- Keep holding to the buttons now, until you see Factory Reset screen.
- Press Volume Down button, followed by the Power key to confirm the process.
- Again, press Volume Down and Power buttons to confirm.
Finally, you will have your LG G3 bump’d and unlocked for any flashing. The process is pretty simple, but it may hassle the people those are new here. So, if you encounter an issue, just write below and we’ll solve it out for you. Wait until we get with some more stuff for the LG G3.
The video source:


