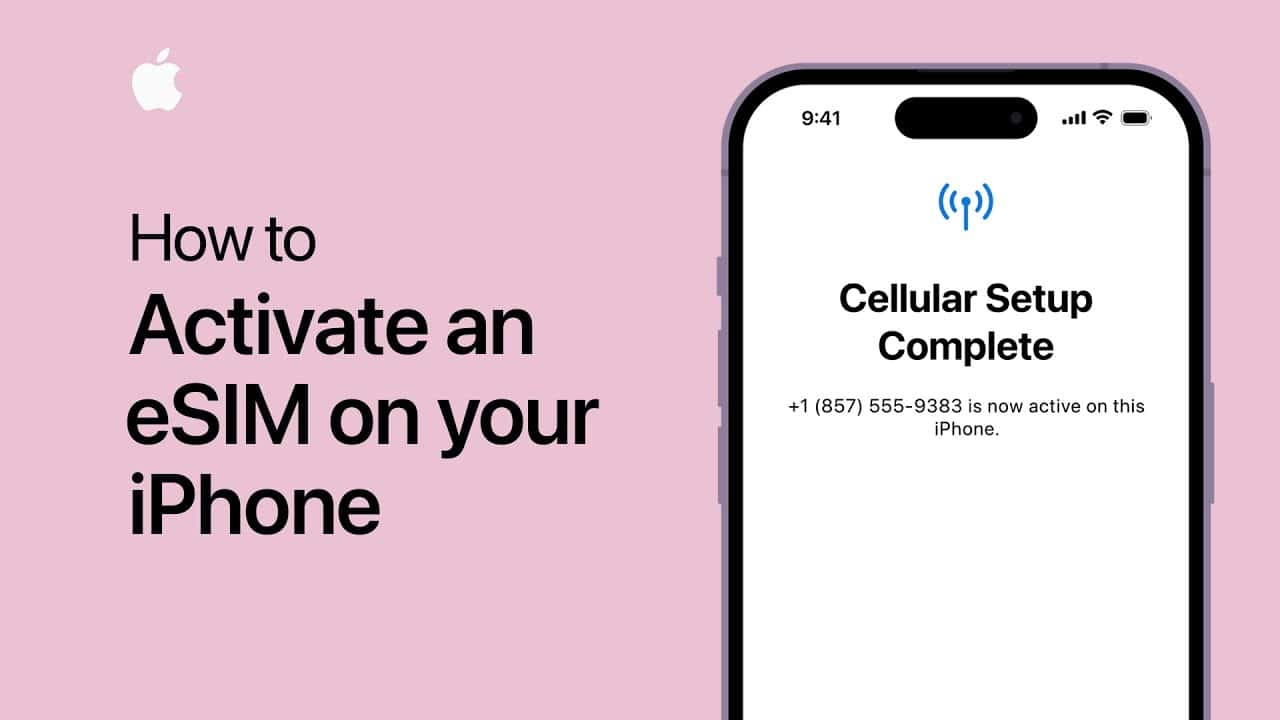
In this guide, we’ll delve into the intricacies of activating an eSIM on your iPhone, specifically focusing on the latest iPhone models such as the iPhone 14, iPhone 14 Pro Max, iPhone 14 Pro, and iPhone 14 mini. With the ever-evolving technology landscape, the introduction of eSIMs has revolutionized how we manage our cellular plans, offering greater flexibility and convenience. Let’s explore how you can seamlessly integrate an eSIM into your iPhone and unlock its full potential.
Understanding eSIMs: What You Need to Know
Before diving into the activation process, let’s grasp the fundamentals of eSIMs. An eSIM (embedded SIM) serves as a digital alternative to traditional physical SIM cards, allowing users to activate cellular plans directly from their device without the need for a physical nano-SIM. With eSIM technology, users can enjoy the convenience of managing multiple cellular plans on a single device, paving the way for enhanced connectivity and versatility.
Key Benefits of eSIMs
- Convenience: Say goodbye to physical SIM cards and the hassle of swapping them between devices.
- Flexibility: Easily switch between multiple cellular plans without needing to procure additional SIM cards.
- Space-Saving: Free up valuable space in your device by eliminating the need for a physical SIM card slot.
- Global Compatibility: Seamlessly activate cellular plans from various carriers worldwide, offering unparalleled flexibility for travelers.
Activating eSIM on iPhone: Step-by-Step Guide
Now that we’ve covered the basics, let’s walk through the process of activating an eSIM on your iPhone. Whether you’re using the latest iPhone 14 series or previous models like the iPhone 12 or iPhone 11, the steps remain relatively consistent.
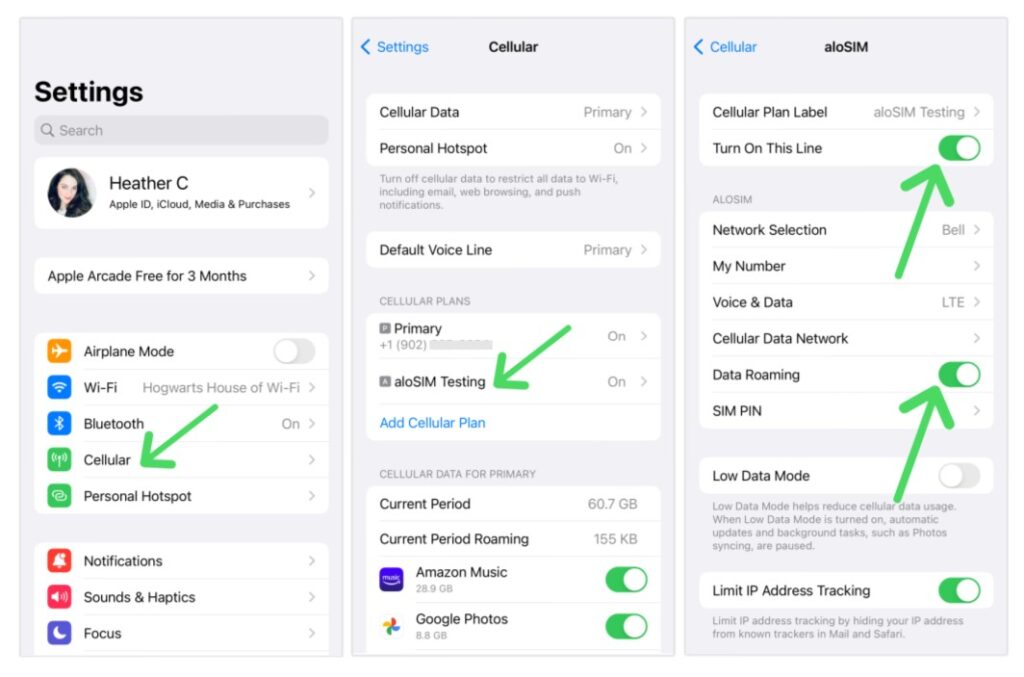
Step 1: Accessing Settings
- iPhone 14: Tap on “Settings” from your home screen.
- iPhone 12/11: Navigate to the “Settings” app on your device.
Step 2: Accessing Cellular/Mobile Data Settings
- Once in the Settings menu, tap on either “Cellular” or “Mobile Data,” depending on your device’s iOS version.
Step 3: Selecting Your Desired Plan
- Within the Cellular/Mobile Data settings, tap on the cellular plan you wish to activate with your eSIM.
Step 4: Activating the eSIM
- After selecting your desired plan, tap on “Turn On This Line” to activate the eSIM.
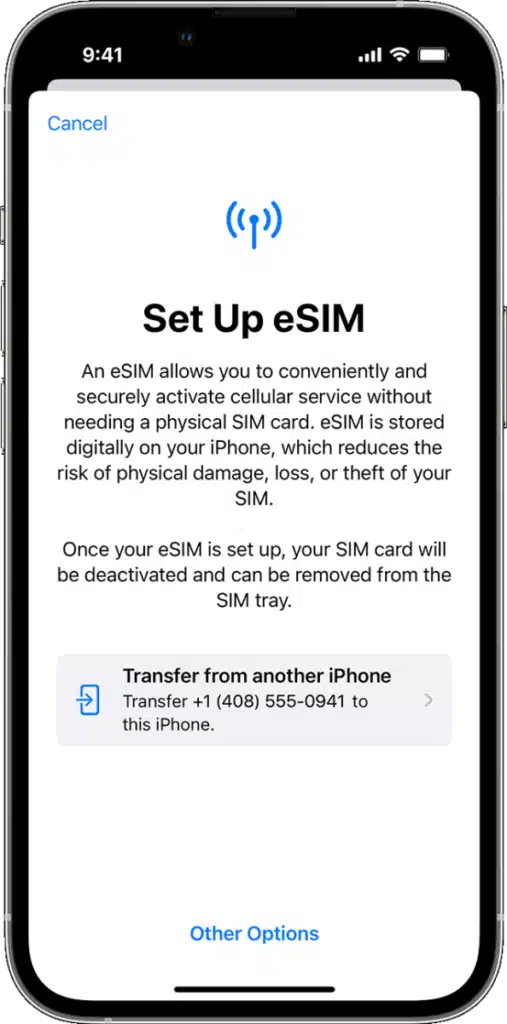
activate esim
Step 5: Labeling Your Plans (Optional)
- For added convenience, you can label your plans to distinguish between them easily. Simply follow the prompts to assign custom labels such as “Business” or “Personal.”
Step 6: Setting Your Default Number
- Choose a default number for making calls and sending messages. You can also configure preferences for iMessage and FaceTime.
Step 7: Managing Dual SIM Usage
- With Dual SIM functionality, you can leverage two phone numbers simultaneously for calls, messages, and data. Familiarize yourself with the options available and tailor them to suit your preferences.
Pro Tips for eSIM Activation:
- Ensure both devices are running iOS 16 or later for seamless transfer.
- Keep your iPhone connected to a stable Wi-Fi network throughout the activation process.
- Check with your carrier for any specific instructions or requirements.
Additional Activation Methods
In addition to the standard setup process outlined above, there are alternative methods for activating your eSIM, depending on your carrier and region. Here are a few additional options to consider:
QR Code Support
If your carrier provides a QR code for eSIM activation, you can simply scan the code using your iPhone’s camera during the setup process.
Convert Physical SIM to eSIM
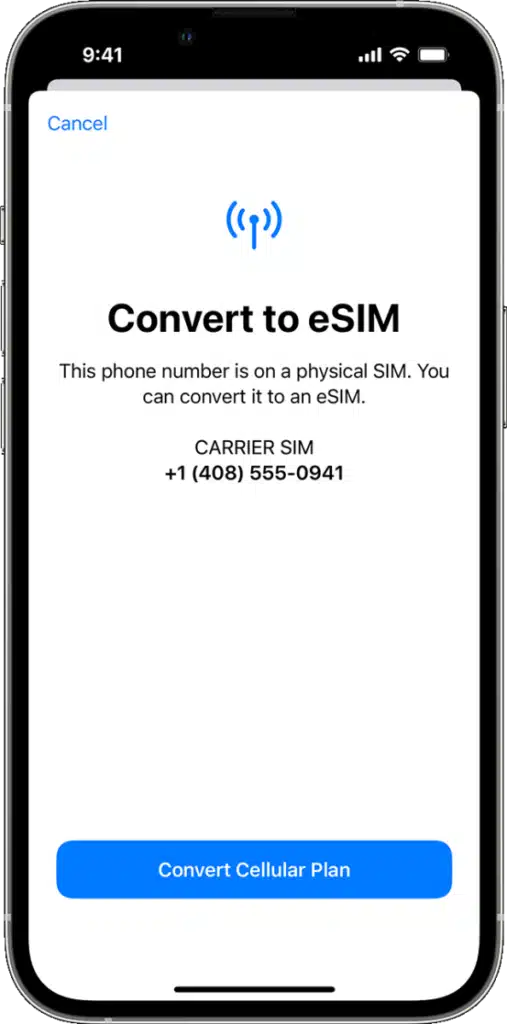
Some carriers offer the option to convert your existing physical SIM card to an eSIM without the need to visit a store. This can typically be done directly through the Settings menu on your iPhone.
Carrier-Specific Apps and Websites
Certain carriers may have dedicated apps or websites that streamline the eSIM activation process. Check with your carrier to see if they offer this convenience.
Tips for Optimizing eSIM Usage
To make the most of your eSIM experience, consider implementing the following tips and tricks:
1. Seamless Call Management
- Let your iPhone remember which number to use for each contact, streamlining your calling experience.
- Take advantage of features like Call Waiting and call forwarding to ensure you never miss important calls.
2. Effortless Messaging
- Switch between phone numbers effortlessly when sending messages via iMessage or SMS/MMS.
- Familiarize yourself with the process of changing your default number for messaging to suit your preferences.
3. Monitoring Dual SIM Status
- Stay informed about the status of your dual SIM setup by monitoring the status icons in your device’s status bar.
- Explore additional status indicators in Control Center for comprehensive insights into your connectivity.
Frequently Asked Questions (FAQs)
- Can I use eSIMs on older iPhone models?
- While eSIM functionality is primarily available on newer iPhone models, some older models such as the iPhone XS, iPhone XS Max, and iPhone XR also support eSIM technology.
- Can I store multiple eSIMs on my iPhone simultaneously?
- Yes, you can store multiple eSIMs on your iPhone, but only one can be active at a time. You can switch between eSIMs as needed via the device settings.
- Are there any additional fees associated with using eSIMs?
- The availability of eSIMs and associated fees may vary depending on your carrier. We recommend consulting with your carrier to understand any potential charges.
- Can I use eSIMs for international travel?
- Absolutely! eSIM technology offers unparalleled convenience for travelers, allowing you to activate local cellular plans seamlessly without the need for physical SIM cards.
- What if I encounter issues with eSIM activation?
- If you encounter any difficulties during the eSIM activation process, we recommend reaching out to your carrier for assistance. They can provide guidance and support to ensure a smooth activation experience.
Conclusion
Activating an eSIM on your iPhone opens up a world of possibilities, enabling you to seamlessly manage multiple cellular plans with ease. Whether you’re a frequent traveler seeking global connectivity or simply looking to streamline your communication setup, eSIM technology offers unmatched convenience and flexibility. By following the step-by-step guide outlined in this article and leveraging the tips provided, you’ll be well-equipped to harness the full potential of eSIMs and elevate your iPhone experience to new heights.
