
Welcome to our guide on bolstering your home network security by changing your WiFi name (SSID). In this comprehensive article, we’ll delve into the reasons behind changing your WiFi name, the risks associated with default SSIDs, and step-by-step instructions on how to choose a strong WiFi SSID. Let’s dive in!
Why Should You Change Your WiFi Name?
Your WiFi SSID is the identity of your wireless network. Changing it is crucial for enhancing security. Default SSIDs make your network an easy target for hackers.

The Risks of Using a Default WiFi SSID
Hackers often exploit default SSIDs, assuming lax security measures. Default names may reveal your device’s brand, aiding attackers in exploiting known vulnerabilities. It’s time to step up your network security game.
Risks of Default WiFi SSID
| Risk | Implication |
|---|---|
| Password-cracking tools | Target default and common SSIDs for easy access |
| Manufacturers’ names | Provide information for exploiting vulnerabilities |
| Easy access to data | Potential theft of sensitive information |
Choosing the Right WiFi SSID
The solution is simple: opt for a unique and robust WiFi SSID. Strengthen your defense with these tips:
- Go for a longer name with letters and numbers.
- Avoid personal information like names or addresses.
- Regularly update your WiFi SSID and password for added security.
How to Change Your WiFi SSID
Ready to make the change? Follow these steps:
- Open your web browser (Chrome, Edge, or Firefox).
- Log in to your router’s Admin console (check the manual for details).
- Access the Wireless menu and find the SSID field.
- Change the default SSID name and save your changes.
Steps to Change WiFi SSID
| Step | Action |
|---|---|
| 1 | Open web browser (Chrome, Edge, or Firefox) |
| 2 | Log in to router’s Admin console |
| 3 | Access Wireless menu |
| 4 | Change SSID name and save changes |
Remember to reconnect devices with the new WiFi SSID.
Third-party routers and mesh systems
| Manufacturer | IP address | Web address | Path |
|---|---|---|---|
| ASUS | 192.168.0.1 192.168.1.1 |
router.asus.com asusrouter.com |
Advanced > Wireless > General |
| D-Link | 192.168.0.1 | dlinkrouter.local mydlink.com |
Settings > Wireless My Devices > Settings > Basic Settings |
| Linksys | 192.168.1.1 | myrouter.local | Configuration > Wi-Fi > Basic Wireless Settings |
| NETGEAR | 192.168.0.1 192.168.1.1 |
routerlogin.net | Basic > Wireless Settings > Wireless Setup |
| NETGEAR | 192.168.1.1 10.0.0.1 |
orbilogin.com orbilogin.net |
Basic > Wireless |
| Synology | 192.168.1.1 | router.synology.com | Wi-Fi Connect > Wireless > Wi-Fi |
| TP-Link | 192.168.0.1 192.168.1.1 |
tplinkwifi.net | Basic > Wireless |
| TP-Link | 192.168.68.1 | tplinkdeco.net | N/A |
You no longer need to jump through hoops to find your router’s IP address. Router manufacturers all now use easy-to-remember web addresses you can simply plug into your web browser. You can also find this necessary info attached to the router or mesh unit. But remember: You must be wired or wirelessly connected to the router to access the web interface.
Why Change Your WiFi Password?
Changing your WiFi password is like giving your network a digital makeover. It safeguards against unauthorized access, protects your personal data, and ensures a smooth, secure online experience.
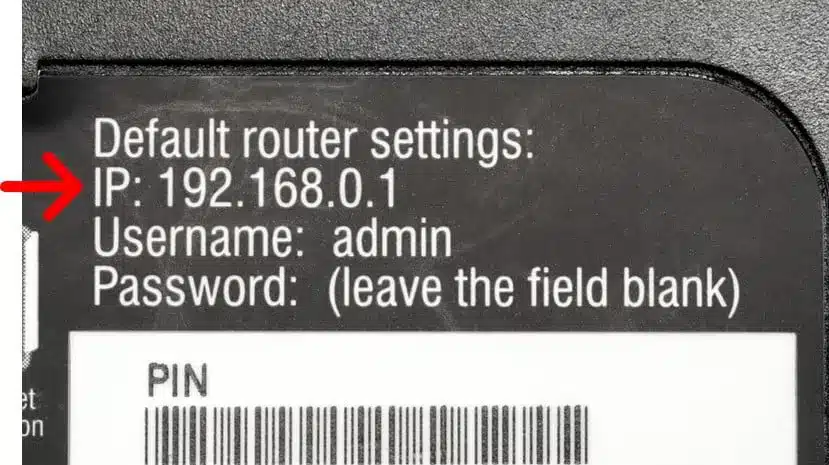
Finding Your Router’s IP Address
Before diving into the password-changing process, you need to locate your router’s IP address. This information is crucial for accessing your router settings. You can find the default IP address on the physical router or through your computer.
| Platform | Steps |
|---|---|
| Windows | Press Windows + R, type “CMD,” and enter “ipconfig.” Look for Default Gateway. |
| Mac | Click Apple icon > System Settings > Network > WiFi > Details. Your IP address is next to Router. |
If the default IP address doesn’t work, consider resetting your router to default settings.
Changing WiFi Name and Password
Now, let’s get to the main event – changing your WiFi name and password. Follow these steps:
- Access Router Settings
- Open any web browser.
- Type your router’s IP address into the address bar.
- Enter Login Credentials
- Use the router’s username and password (not your WiFi credentials).
- Common default usernames: “admin,” “user,” or leave it blank.
- Common default passwords: “admin,” “password,” or leave it blank.
- Navigate to Wireless Settings
- Find the Wireless or Advanced settings depending on your router brand.
| Router Brand | Path to Wireless Settings |
|---|---|
| Asus | Wireless > General |
| Linksys | Configuration > WiFi > Wireless Security |
| Netgear | Basic > Wireless, or Settings > Wireless Setup |
| TP-Link | Wireless > Wireless Setting, or Basic > Wireless, or Basic Settings > Wireless Security |
- Change WiFi Name and Password
- Locate “Name” or “SSID” to change the network name.
- Find “Password,” “Passphrase,” or “Pre-Shared Key” to change the password.
Remember: If you have a dual-band or tri-band router, select the right WiFi network.
- Apply or Save Changes
- Click Apply or Save to finalize your changes.
Additional Tips and Considerations
- Always ensure your device is connected to the router’s WiFi network before making changes.
- For mesh WiFi systems, like Amazon eero or Google Nest, use the companion app.
- If using URLs to access your router, be cautious of security warnings. Your connection is secure as long as you entered the IP address correctly.
Frequently Asked Questions
- Why should I change my WiFi password regularly?
- Regular changes enhance security and protect against potential breaches.
- What if I forget my WiFi password?
- Check out our step-by-step guides for Windows and Mac in the article.
- Can I reset my router to default settings if needed?
- Yes, it’s an option, but be aware of the implications, as it resets all configurations.
- How do I reconnect devices after changing WiFi credentials?
- Devices will disconnect automatically. Reconnect them using the new WiFi username and password.
- What if I can’t log in to my router?
- Contact HelloTech for prompt assistance from our nationwide network of technicians.
Conclusion
Securing your WiFi is more than just a routine task; it’s a digital responsibility. By following this comprehensive guide, you ensure your network remains a fortress against unauthorized access.


