-
Table of Contents
- Understanding the Err_Cache_Miss Error in Google Chrome
- Common Causes of the Err_Cache_Miss Error in Google Chrome
- Step-by-Step Guide to Fix the Err_Cache_Miss Error in Google Chrome
- Clearing Browser Cache to Resolve the Err_Cache_Miss Error in Google Chrome
- Disabling Browser Extensions to Fix the Err_Cache_Miss Error in Google Chrome
- Updating Google Chrome to Resolve the Err_Cache_Miss Error
- Conclusion
Understanding the Err_Cache_Miss Error in Google Chrome
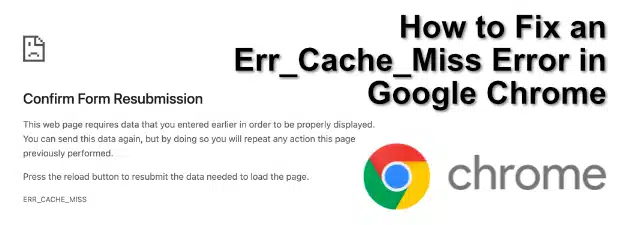
The Err_Cache_Miss error is a common issue that many Google Chrome users encounter. It can be frustrating when you’re trying to browse the web and suddenly you’re faced with this error message. But fear not, because in this article, we will guide you through understanding and fixing the Err_Cache_Miss error in Google Chrome.
To begin, let’s delve into what exactly the Err_Cache_Miss error means. This error occurs when the browser is unable to retrieve a requested resource from the cache. The cache is a temporary storage location on your computer that stores files and data from websites you visit. When you revisit a website, Chrome checks the cache first to see if it already has the necessary files. If it doesn’t, it fetches them from the server. However, if there is an issue with the cache, such as corruption or misconfiguration, the Err_Cache_Miss error is triggered.
Now that we have a better understanding of the error, let’s move on to fixing it. The first step is to clear your browser cache. To do this, open Chrome and click on the three-dot menu in the top-right corner. From the dropdown menu, select “More tools” and then “Clear browsing data.” A new tab will open with various options. Make sure the “Cached images and files” box is checked, and then click on the “Clear data” button. This will remove all cached files from your browser.
If clearing the cache doesn’t resolve the issue, the next step is to disable browser extensions. Sometimes, extensions can interfere with the caching process and cause errors. To disable extensions, go back to the three-dot menu and select “More tools” again. This time, choose “Extensions” from the menu. You will see a list of all the extensions installed in your browser. Disable them one by one by toggling the switch next to each extension. After disabling an extension, refresh the page and check if the error persists. If it doesn’t, you have found the culprit.
If neither clearing the cache nor disabling extensions solves the problem, it’s time to check for any available updates for Google Chrome. Outdated software can often lead to compatibility issues and errors. To check for updates, go to the three-dot menu and select “Settings.” Scroll down and click on “About Chrome” in the left-hand menu. Chrome will automatically check for updates and install them if available. After the update is complete, restart your browser and see if the error is resolved.
In some cases, the Err_Cache_Miss error can be caused by a misconfigured DNS (Domain Name System) setting. To fix this, you can try changing your DNS server. Open the Control Panel on your computer and navigate to the Network and Internet settings. Click on “Network and Sharing Center” and then select “Change adapter settings” from the left-hand menu. Right-click on your active network connection and choose “Properties.” In the Properties window, select “Internet Protocol Version 4 (TCP/IPv4)” and click on the “Properties” button. From there, you can manually enter a different DNS server address, such as Google’s public DNS (8.8.8.8). Save the changes and restart your computer to apply the new settings.
In conclusion, the Err_Cache_Miss error in Google Chrome can be frustrating, but it is not insurmountable. By following the steps outlined in this article, you can understand and fix this error. Remember to clear your cache, disable extensions, update your browser, and check your DNS settings. With a little patience and perseverance, you’ll be back to browsing the web smoothly in no time.
Common Causes of the Err_Cache_Miss Error in Google Chrome
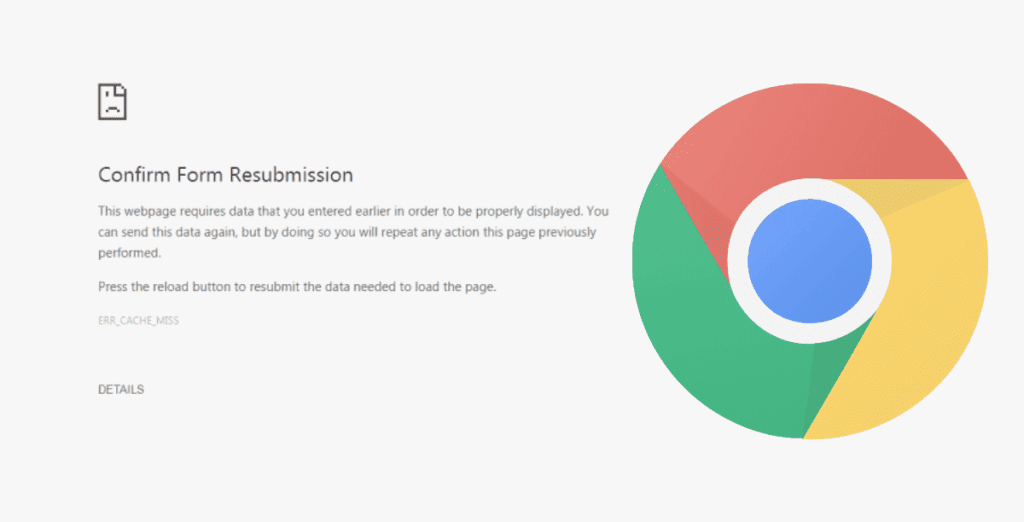
The “Err_Cache_Miss” error is a common issue that many Google Chrome users encounter. This error occurs when the browser is unable to retrieve a requested webpage from its cache. Instead, it must fetch the page from the server, resulting in slower loading times and potential disruptions to your browsing experience. Understanding the common causes of this error can help you troubleshoot and fix it more effectively.
One of the main causes of the “Err_Cache_Miss” error is an outdated or corrupted cache. The cache is a temporary storage location where Chrome stores website data to improve loading times. Over time, this cache can become cluttered with outdated or corrupted files, leading to errors like “Err_Cache_Miss.” To fix this issue, you can clear your browser cache by going to the Chrome settings, selecting “Privacy and security,” and clicking on “Clear browsing data.” Make sure to select the option to clear the cache and any other relevant data, such as cookies and browsing history.
Another common cause of the “Err_Cache_Miss” error is conflicting browser extensions or plugins. These add-ons can sometimes interfere with the caching process, resulting in errors. To troubleshoot this issue, try disabling all your extensions and plugins and then gradually re-enabling them one by one. This will help you identify if a specific extension or plugin is causing the error. Once you pinpoint the problematic add-on, consider removing it or finding an alternative that is compatible with your browser.
In some cases, the “Err_Cache_Miss” error may be caused by a misconfigured proxy server. A proxy server acts as an intermediary between your browser and the internet, but if it is not properly configured, it can disrupt the caching process and trigger errors. To fix this issue, go to your Chrome settings, select “System,” and click on “Open proxy settings.” From there, make sure that the proxy server settings are correct or disable the proxy server altogether if you don’t need it.
Additionally, outdated or incompatible browser settings can also contribute to the “Err_Cache_Miss” error. For example, if your browser is set to automatically delete browsing data upon exit, it can prevent Chrome from properly caching webpages. To check your browser settings, go to the Chrome settings, select “Privacy and security,” and ensure that the option to delete browsing data upon exit is disabled.
Lastly, a corrupted or outdated version of Google Chrome itself can be the culprit behind the “Err_Cache_Miss” error. It is essential to keep your browser up to date to ensure optimal performance and compatibility with websites. To update Chrome, go to the Chrome settings, select “About Chrome,” and click on “Check for updates.” If an update is available, follow the prompts to install it.
In conclusion, the “Err_Cache_Miss” error in Google Chrome can be frustrating, but it is not insurmountable. By understanding the common causes of this error, such as an outdated cache, conflicting extensions, misconfigured proxy servers, and outdated browser settings, you can take the necessary steps to fix it. Clearing your cache, disabling conflicting extensions, checking proxy server settings, adjusting browser settings, and updating Chrome are all effective troubleshooting methods. With a little patience and perseverance, you can resolve the “Err_Cache_Miss” error and enjoy a smoother browsing experience.
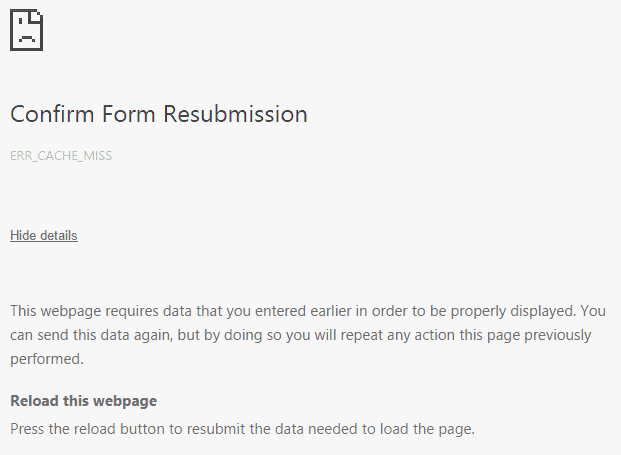
Step-by-Step Guide to Fix the Err_Cache_Miss Error in Google Chrome
Are you frustrated with the “Err_Cache_Miss” error that keeps popping up in Google Chrome? Don’t worry, you’re not alone. This error can be quite annoying, but the good news is that there are steps you can take to fix it. In this step-by-step guide, we will walk you through the process of resolving the “Err_Cache_Miss” error in Google Chrome.
Firstly, let’s understand what the “Err_Cache_Miss” error actually means. This error occurs when the browser is unable to find a cached copy of a webpage. It usually happens when there is a problem with the cache or when the cache is full. So, how do we fix it?
Step 1: Clear the Cache
The first step is to clear the cache in Google Chrome. To do this, open Chrome and click on the three dots in the top-right corner of the browser window. From the drop-down menu, select “More tools” and then “Clear browsing data.” Make sure to check the box next to “Cached images and files” and click on the “Clear data” button. This will remove all the cached files from your browser.
Step 2: Disable Browser Extensions
Sometimes, browser extensions can interfere with the caching process and cause the “Err_Cache_Miss” error. To check if this is the case, go back to the three dots menu and select “More tools” and then “Extensions.” Disable all the extensions by toggling the switch next to each one. Once disabled, restart your browser and see if the error persists.
Step 3: Update Google Chrome
Outdated versions of Google Chrome can also lead to the “Err_Cache_Miss” error. To ensure that you have the latest version, go to the three dots menu and select “Settings.” Scroll down and click on “About Chrome.” Chrome will automatically check for updates and install them if available. After the update is complete, restart your browser and check if the error is resolved.
Step 4: Reset Chrome Settings
If the above steps didn’t work, you can try resetting Chrome settings to their default values. To do this, go to the three dots menu, select “Settings,” and scroll down to the bottom of the page. Click on “Advanced” to expand the advanced settings. Scroll down again and click on “Reset settings.” Confirm the reset by clicking on the “Reset settings” button. This will restore Chrome to its original state, and hopefully, fix the “Err_Cache_Miss” error.
Step 5: Reinstall Google Chrome
If all else fails, you can try reinstalling Google Chrome. Uninstall the browser from your computer and then download the latest version from the official website. Install it again and see if the error persists. This step should only be taken as a last resort, as it will remove all your bookmarks, history, and saved passwords.
In conclusion, the “Err_Cache_Miss” error in Google Chrome can be frustrating, but it is not insurmountable. By following these step-by-step instructions, you can resolve the error and get back to browsing without any interruptions. Remember to clear the cache, disable extensions, update Chrome, reset settings, and reinstall the browser if necessary. With a little patience and determination, you’ll be able to fix the “Err_Cache_Miss” error and enjoy a smooth browsing experience once again.
Clearing Browser Cache to Resolve the Err_Cache_Miss Error in Google Chrome
Are you frustrated with the “Err_Cache_Miss” error that keeps popping up in Google Chrome? Don’t worry, you’re not alone. This error occurs when the browser fails to retrieve data from the cache, resulting in a disruption of your browsing experience. But fear not, because there is a solution! By clearing your browser cache, you can resolve the “Err_Cache_Miss” error and get back to smooth browsing in no time.
Clearing your browser cache may sound like a daunting task, but it’s actually quite simple. It involves deleting temporary files and data that your browser stores to speed up your browsing experience. These files can sometimes become corrupted or outdated, leading to errors like “Err_Cache_Miss.” So, let’s dive into the steps you need to take to fix this error.
First, open Google Chrome and click on the three-dot menu icon in the top-right corner of the browser window. From the drop-down menu, select “Settings.” This will take you to the Chrome settings page.
Once you’re on the settings page, scroll down until you see the “Privacy and security” section. Click on “Clear browsing data.” A new tab will open with various options for clearing your browsing data.
In the new tab, you’ll see a list of checkboxes next to different types of data. Make sure the checkbox next to “Cached images and files” is selected. You can also choose to clear other types of data if you wish, but for now, we’re focusing on clearing the cache to resolve the “Err_Cache_Miss” error.
After selecting the appropriate checkboxes, click on the “Clear data” button. Chrome will then start clearing your browser cache. This process may take a few moments, depending on the amount of data stored in your cache.
Once the cache is cleared, you can close the settings tab and return to your regular browsing. You should notice a significant improvement in your browsing experience, with the “Err_Cache_Miss” error no longer appearing.
It’s important to note that clearing your browser cache is a temporary solution. Over time, your cache will fill up again, and you may encounter the same error. To prevent this from happening, it’s a good idea to regularly clear your cache. You can do this by following the same steps outlined above.
In addition to clearing your cache, there are a few other steps you can take to optimize your browsing experience and minimize the occurrence of the “Err_Cache_Miss” error. These include keeping your browser and extensions up to date, disabling unnecessary plugins, and running a malware scan on your computer.
By following these steps, you can ensure that your browsing experience remains smooth and error-free. Don’t let the “Err_Cache_Miss” error get in the way of your online activities. Take control of your browser by clearing your cache and implementing other optimization techniques. You’ll be amazed at how much of a difference it can make.
So, the next time you encounter the “Err_Cache_Miss” error in Google Chrome, don’t panic. Instead, take a deep breath and follow the steps outlined in this article. With a little bit of effort, you’ll be back to enjoying seamless browsing in no time. Happy browsing!
Disabling Browser Extensions to Fix the Err_Cache_Miss Error in Google Chrome
Google Chrome is undoubtedly one of the most popular web browsers out there, known for its speed, reliability, and user-friendly interface. However, like any other software, it is not immune to errors. One such error that users often encounter is the “Err_Cache_Miss” error. This error can be frustrating, as it prevents you from accessing certain websites or causes them to load improperly. Fortunately, there are several steps you can take to fix this error and get back to browsing seamlessly.
One of the most effective ways to fix the “Err_Cache_Miss” error in Google Chrome is by disabling browser extensions. Extensions are small software programs that enhance the functionality of your browser by adding new features or modifying existing ones. While extensions can be incredibly useful, they can also be the cause of various errors, including the “Err_Cache_Miss” error.
To disable browser extensions in Google Chrome, you need to access the browser’s settings. To do this, click on the three vertical dots in the top-right corner of the browser window and select “Settings” from the drop-down menu. Alternatively, you can type “chrome://settings” in the address bar and hit Enter.
Once you are in the settings menu, scroll down and click on “Extensions” in the left-hand sidebar. Here, you will see a list of all the extensions installed in your browser. To disable an extension, simply toggle the switch next to it to the off position. It is recommended to disable all extensions at once to determine if any of them are causing the “Err_Cache_Miss” error.
After disabling the extensions, close and reopen Google Chrome. Try accessing the website that was previously showing the error and see if the issue persists. If the error is resolved, it means that one or more of the disabled extensions were causing the problem.
To identify the specific extension causing the error, you will need to enable the extensions one by one and test the website after enabling each one. This process may take some time, but it is crucial to pinpoint the problematic extension. Once you have identified the culprit, you can either remove it permanently or look for an updated version that is compatible with your browser.
It is worth noting that disabling or removing extensions may affect your browsing experience, as you will no longer have access to their features. However, it is a necessary step to fix the “Err_Cache_Miss” error. If you find that you can live without a particular extension, it is best to remove it entirely to avoid any future conflicts.
In conclusion, the “Err_Cache_Miss” error in Google Chrome can be frustrating, but it is not insurmountable. By disabling browser extensions, you can often resolve this error and get back to browsing without any interruptions. Remember to disable all extensions at once and then enable them one by one to identify the problematic one. With a little patience and troubleshooting, you can enjoy a seamless browsing experience once again.
Updating Google Chrome to Resolve the Err_Cache_Miss Error
Google Chrome is undoubtedly one of the most popular web browsers out there, known for its speed, reliability, and user-friendly interface. However, like any software, it is not immune to errors. One such error that users often encounter is the “Err_Cache_Miss” error. This error can be frustrating, as it prevents you from accessing certain websites or causes them to load improperly. But fear not, for there are several steps you can take to fix this error and get back to browsing the web seamlessly.
The first step in resolving the “Err_Cache_Miss” error is to update your Google Chrome browser. Outdated software can often lead to compatibility issues and errors. To update Google Chrome, simply follow these steps:
1. Open Google Chrome and click on the three vertical dots in the top-right corner of the browser window.
2. From the drop-down menu, select “Settings.”
3. In the Settings tab, scroll down and click on “About Chrome.”
4. Chrome will automatically check for updates and install them if available. If an update is found, click on “Relaunch” to complete the update process.
Updating your browser not only ensures that you have the latest features and security patches but also fixes any bugs or compatibility issues that may be causing the “Err_Cache_Miss” error.
If updating Google Chrome doesn’t resolve the error, the next step is to clear your browser cache. The cache is a temporary storage location where the browser stores website data to improve loading times. However, a corrupted or outdated cache can sometimes cause errors. To clear your cache in Google Chrome, follow these steps:
1. Open Google Chrome and click on the three vertical dots in the top-right corner of the browser window.
2. From the drop-down menu, select “More tools” and then “Clear browsing data.”
3. In the Clear browsing data window, select the time range for which you want to clear the cache. It is recommended to choose “All time” to ensure a thorough cleanup.
4. Check the box next to “Cached images and files” and any other data you want to clear.
5. Click on the “Clear data” button to delete the selected items from your browser cache.
Clearing your cache can often resolve the “Err_Cache_Miss” error by removing any corrupted or outdated data that may be causing conflicts with websites.
If the error still persists after updating Google Chrome and clearing the cache, the next step is to disable browser extensions. Extensions are add-ons that enhance the functionality of your browser, but they can sometimes interfere with website loading and cause errors. To disable extensions in Google Chrome, follow these steps:
1. Open Google Chrome and click on the three vertical dots in the top-right corner of the browser window.
2. From the drop-down menu, select “More tools” and then “Extensions.”
3. In the Extensions tab, you will see a list of all the extensions installed in your browser.
4. To disable an extension, simply toggle the switch next to it to the off position.
Disable extensions one by one and check if the “Err_Cache_Miss” error is resolved after each disable. This will help you identify if a specific extension is causing the error.
In conclusion, encountering the “Err_Cache_Miss” error in Google Chrome can be frustrating, but it is not insurmountable. By updating your browser, clearing the cache, and disabling extensions, you can resolve this error and get back to enjoying a seamless browsing experience. Remember to always keep your browser up to date and periodically clear your cache to prevent such errors from occurring in the future. Happy browsing!
Conclusion
To fix the “Err_Cache_Miss” error in Google Chrome, you can try the following solutions:
1. Clear browser cache: Go to Chrome settings, click on “Privacy and security,” then select “Clear browsing data.” Choose the time range and check the box for “Cached images and files.” Click on “Clear data” to remove the cache.
2. Disable browser extensions: Some extensions may interfere with the browser’s cache. Disable all extensions and check if the error persists. If not, enable them one by one to identify the problematic extension.
3. Update Chrome: Ensure that you are using the latest version of Google Chrome. Go to Chrome settings, click on “About Chrome,” and it will automatically check for updates. If an update is available, install it.
4. Reset Chrome settings: In Chrome settings, click on “Advanced” and then select “Reset and clean up.” Choose the option to “Restore settings to their original defaults” and confirm the reset.
5. Disable caching in developer tools: Open Chrome developer tools by pressing F12 or right-clicking on a webpage and selecting “Inspect.” In the developer tools panel, click on the “Network” tab and check the box for “Disable cache.” Refresh the page to see if the error is resolved.
If none of these solutions work, you may need to seek further assistance or consider reinstalling Google Chrome.
