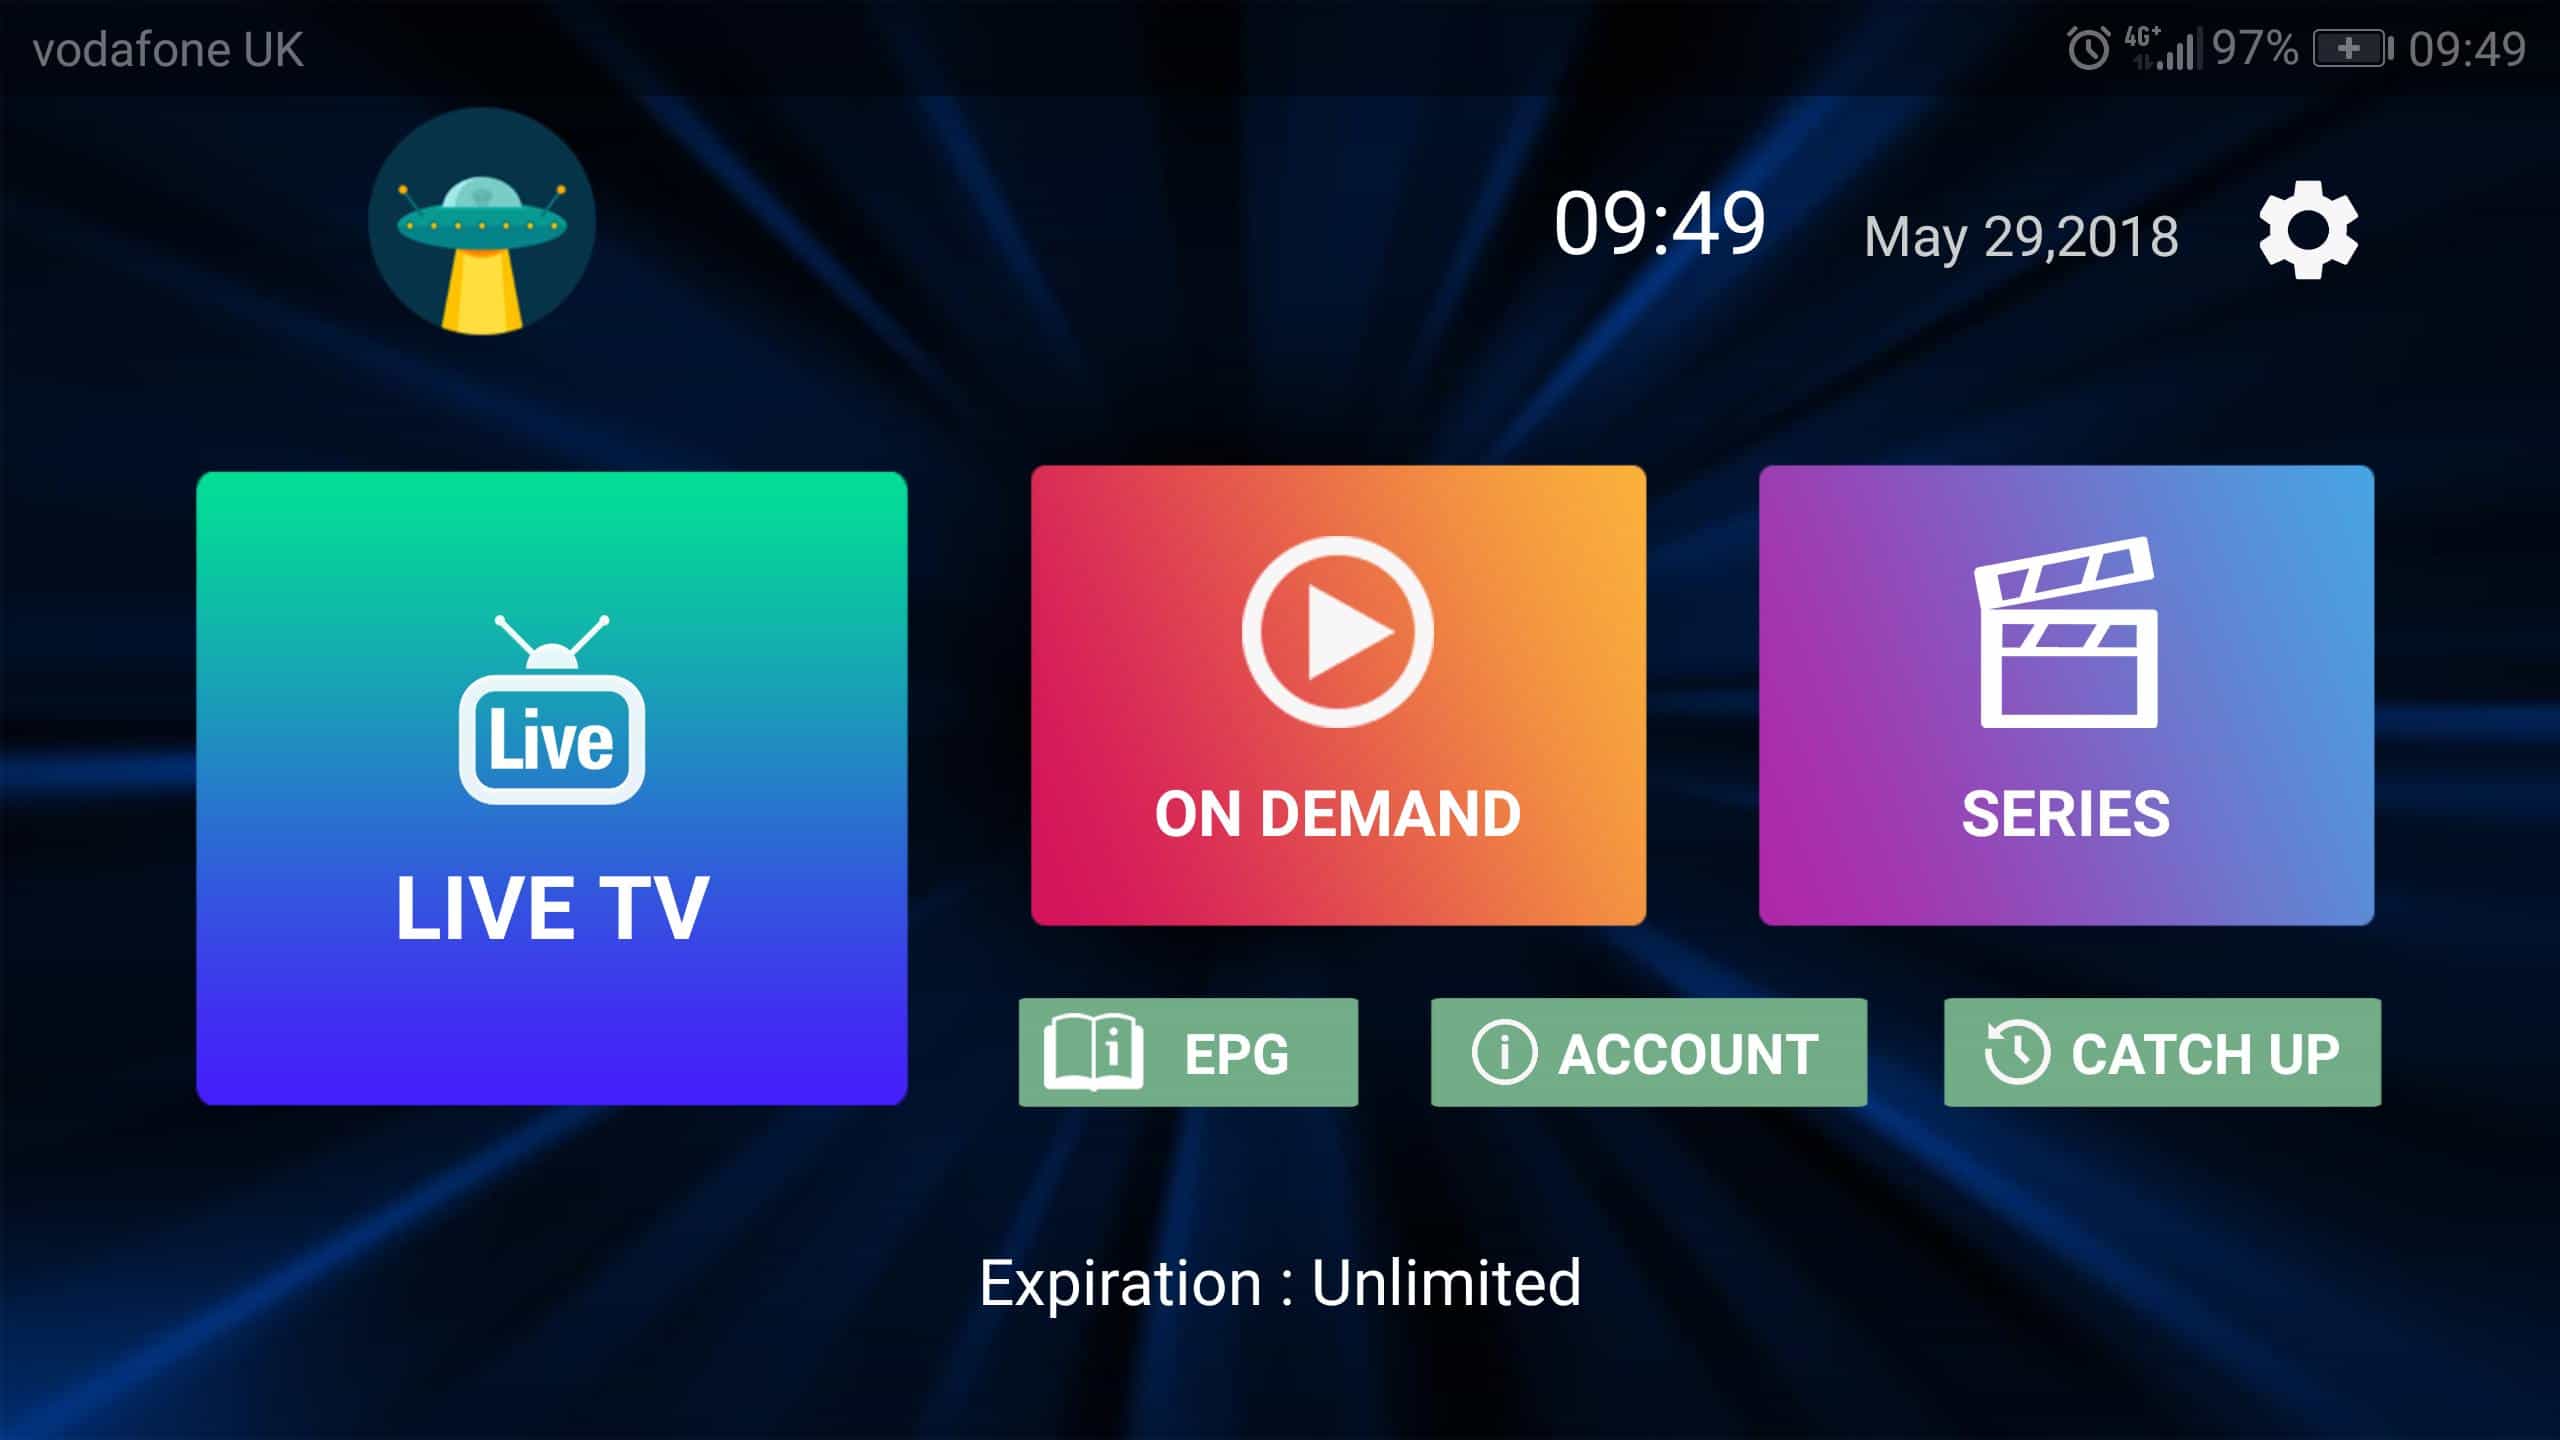
Area 51 IPTV is an inexpensive television service that provides over 1,000 channels with most in HD quality. Area 51 features your favorite serves up the most popular sport season packages such as NFL, NBA, NHL, and MLB all. Sporting events are also available within the service as well. An Adult section is provided by creating a password, and users may restrict access to this within the settings panel.
You will need an internet-connected device, therefore, to enjoy IPTV. In TV, the broadcaster has control over the program, so the user doesn’t have control over what application comes on at what schedule. That changes. It gives the power to the user. The user chooses the program to watch, and the IPTV broadcaster sends it. Another service available on IPTV is Time Shifted Service. The consumer can pause TV Programs and continue watching them later with Time-shifted service. IPTV Broadcasters offer Live TV service that is wonderful for viewing Live game Events.
You can set up the service on as many devices as you’d like, but you can only use it at a time when you register unless you buy additional connections. Additional connections will allow you to use the service on multiple devices concurrently.
Area 51 IPTV price chart:

Live TV Categories
- All
- PPV/Live Events
- International Sports
- Misc/Religion/Holidays
- Music
- Favourties
- Canada
- 24/7
- All Major Sports Packages (NFL, MLB, NHL, NBA, NCAAF)
- Polish
- UK
- USA
- USA Sports
- News
- Kids
- Adults 18+ (Password restrictions available)
Area 51 Features
- Over 1,000 channels with most in HD quality
- Pay on month-to-month basis with no contract
- Access to all sport season packages (NFL, NBA, NHL, MLB)
- Pay-per-view sporting events
- External player support
- Chromecast support when using VLC video player
- Remote-control friendly interface
- Available as an APK (Android application)
- May be installed through Kodi with an addon
- Adult section that may be password-protected
- Online account portal available for support tickets and paying invoices
- Update feature in app settings
- May record live IPTV streams
Clients also have easy to access Support that is available through online Support Tickets.
Area 51 accepts payment via Mastercard, Discover, American Express, Visa, and PayPal.
How to Install Area 51 IPTV on Firestick TV & # Android
The procedure for installing Area 51 on Amazon Fire Stick/ Fire TV and other Android powered devices is similar.
Step 1
First, you need to have enabled the option “Unknown sources”. This will enable you to install apps that aren’t from Amazon Store or Play Store on your device. The procedure is different for different devices but you should get the option under your device settings.
For the Fire Stick, Go to Home > Settings > My Fire TV > Developer Options > Apps from Unknown Sources and turn the last option Turn On.
# On Android, you should find the setting under Settings >Security. This could be different for your device though.
Step 2
After enabling Apps from unknown sources on your device, you now need to download the APK for installing the application. On your Fire Stick/ Fire TV you can use “Downloader” or “ES File Explorer”. Both of these apps are available on the Amazon Store so if you don’t have either of them be sure to get them using the following steps.
- Go to Home of your Firestick
- Click on the magnifying glass icon on the Top left
- Type the name of the preferred app- “Downloader” or “ES Explorer”
- Locate the app on Amazon store (Downloader has a distinct orange icon)
- Tap on Download. It will start the download and Installation process automatically
- Once it is done, Launch the app.
# For Android, you don’t need to have another additional app since your web browser will do just fine.
Step 3
Once you have installed “Downloader” on your Fire TV/ Fire Stick, input exactly the following URL to download the APK: a51.apk – Click on Go to download the file.
Be sure to download the app only from this website since there are many Area 51 apps out there which could harm your device or cause you to be hacked.
# On Android, go to your web browser and visit this URL: a51.apk – This should take you directly to our server and will start to download the latest Area 51 IPTV APK automatically.
Step 4
Once the download has finished, click on Install to begin installing the app. On theFirestick TV, once installation is complete you will be asked if you want to keep the original APK, you can choose to keep it in case you plan to reinstall the app or delete it to save on space.
# The same applied to other Android devices. I recommend keeping the app just in case you need to reinstall the app or share it with a Friend or Family.
How to Install Area 51 IPTV Kodi Addon on Leia
The Area 51 addon is available for Kodi as a third party addon so it’s not available on the official Kodi store. To install the addon on Kodi Leia, make sure you have configured a VPN service on the device you have Kodi installed on. After that, launch Kodi and follow the following steps.
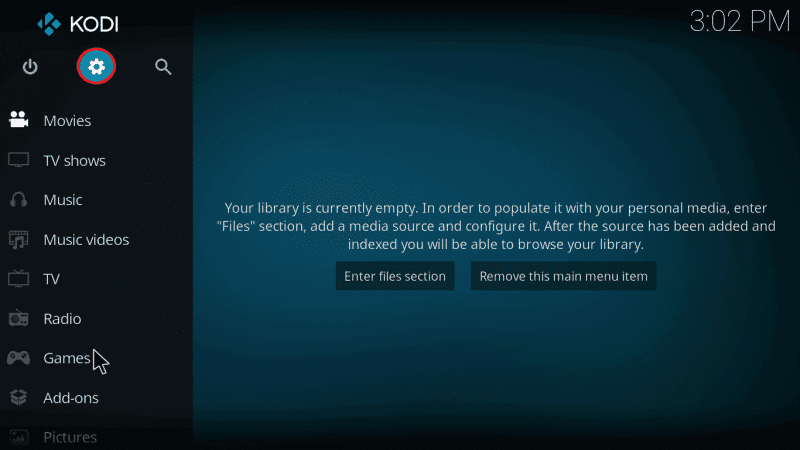
- Open the Kodi app on your Firestick menu. Select the “Settings” option in the menu on the top left with a gear icon.
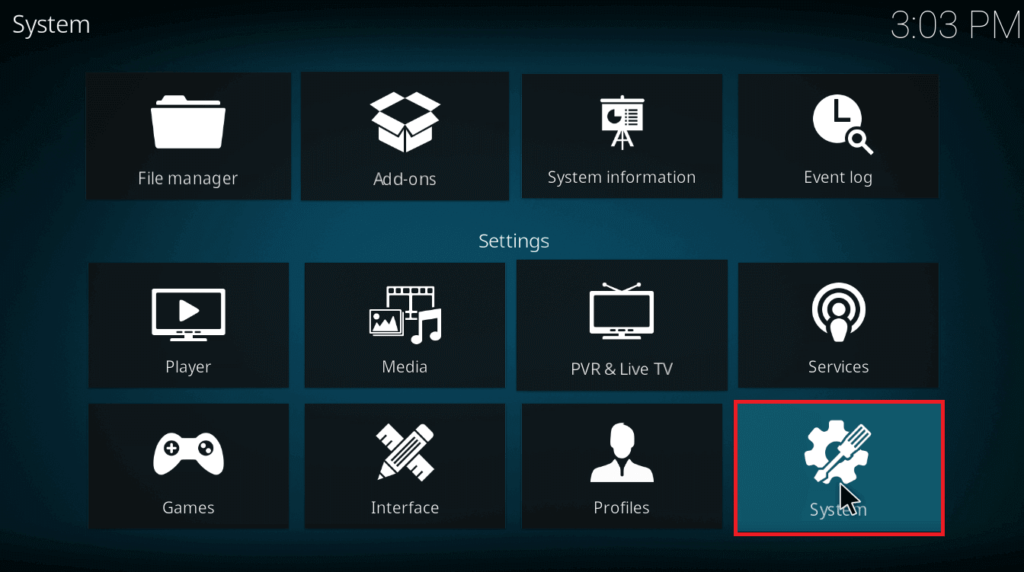
- Then select “System Settings” in the next menu window. In Kodi Leia, this same option will be renamed as “System”.
- Next, choose the add-ons option on the left menu panel in the screen that pops up.
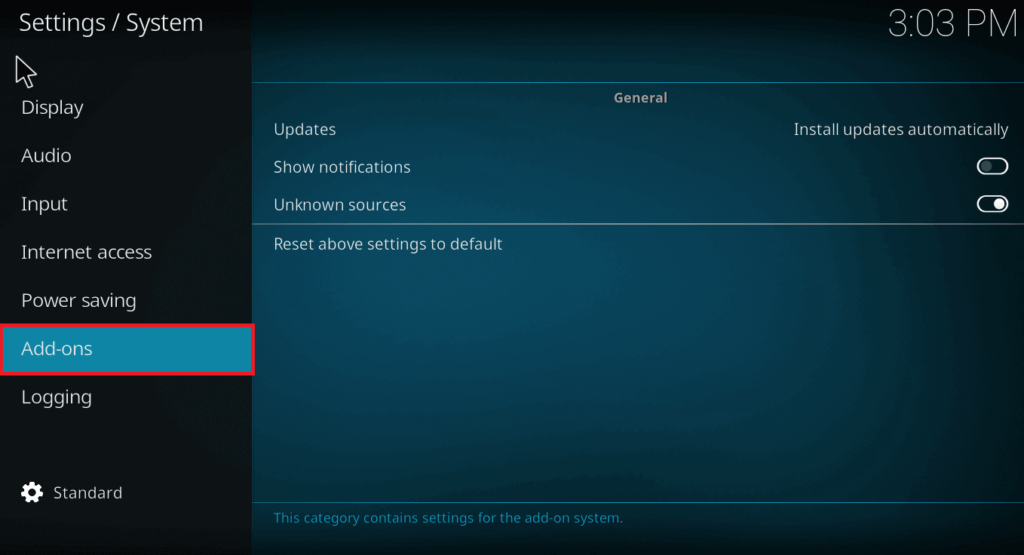
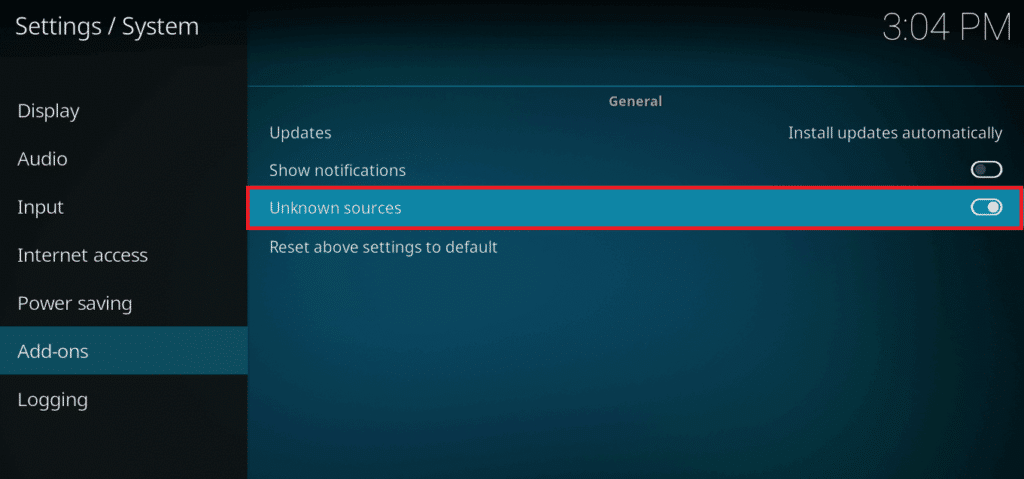
- Toggle ON the Unknown Sources option to allow it to download our third-party Players Klub add on.
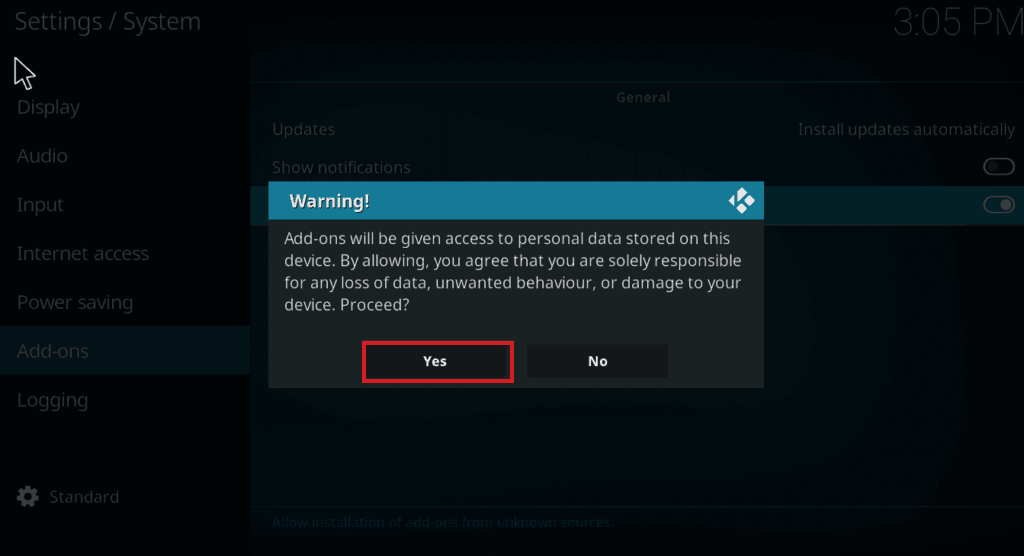
- In the confirmation prompt, select the “Yes” option to go ahead with the process.
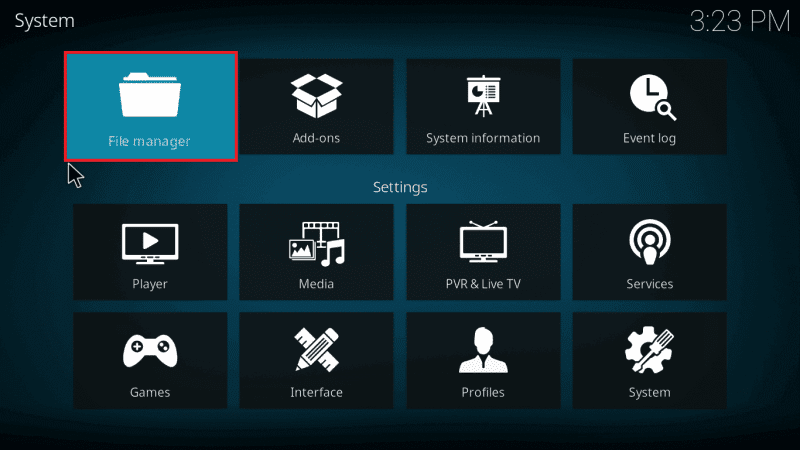
- Now, head back over to the Kodi Home and select Settings gear icon.

- Select the “File Manager” option on the next screen.
- In the next screen, click on the “Add source” option.
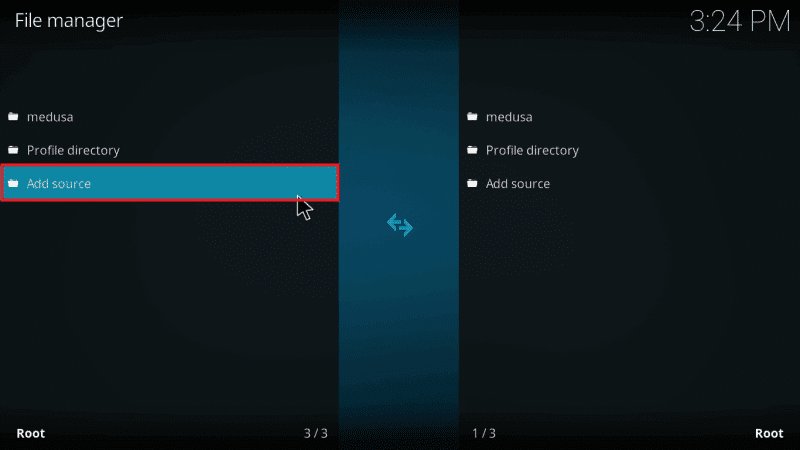
- In the next screen where you see the ‘None’ option, select the text box window.
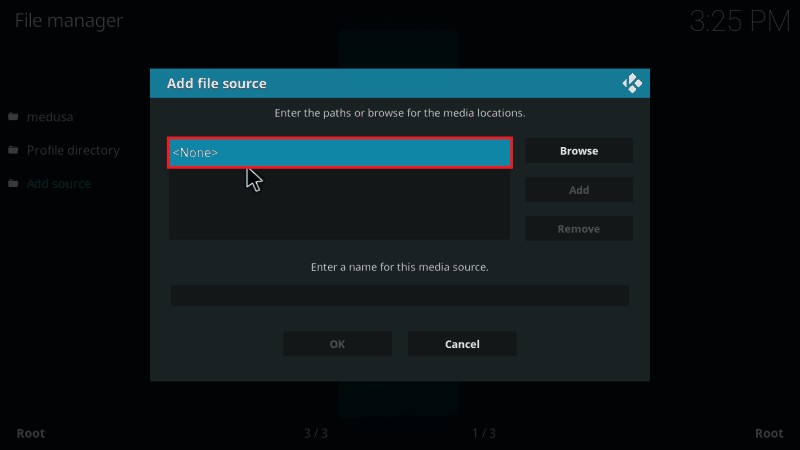
- Type the exactly following link: http://theuforepo.us/repo/ Then just select the “OK” option.

- Now enter a name for this source by selecting the “Enter a name for this media source”. Type UFO or You can choose a different or changed it as required. Click on Ok once you finish it.
- Now head back to the Kodi Home screen and click on the “Addons” option.
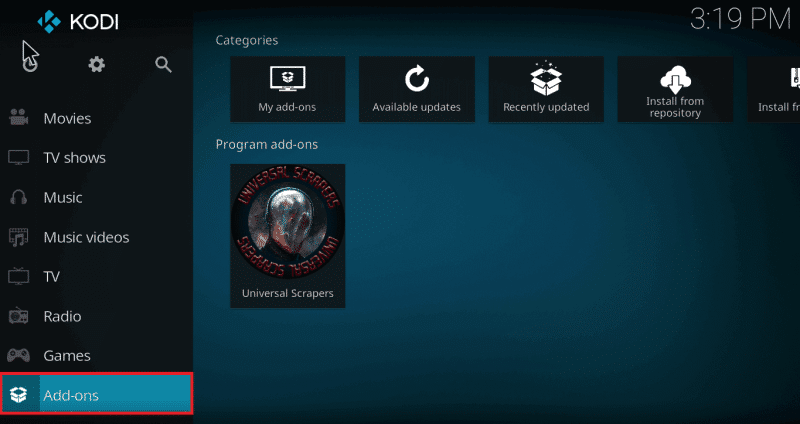
- Now you will see an open boxed shaped icon on the top left corner aka Package Installer.
- As the next step, choose the “Install from the zip” option. This is because our file is .zip in the downloaded file.
- Next, select the UFO option / any name you edited or typed in at the naming step (Step 11).

- Now, choose the downloaded zip file “repository.ufo-repo-x.x-zip.

- Now, the Kodi Player will start installing the add-on in the file. It will give you a “UFO Repository Add-on installed” when successfully downloaded.

- Select the “Install from repository” option in the next screen. This is basically installing the required updates and system files from the online repository of Area 51 IPTV addon.
- Next, choose UFO Repository.
- On the next screen, choose the “Video Add-ons” option.
- In the next screen, Choose “Area 51 IPTV” addon.
- To initiate system installation click on the “Install” button. You might see another pop up after this step, especially on the latest Kodi Leia 18.1. Choose the “OK” option on this pop up which will take us forward.
- After successful installation, it shows the notification with the message: “Area 51 IPTV add-on installed”.

The addon should run smoothly but if you are not much happy its performance on your device, you can optimize its performance by following below steps.
On the Home screen, Go to Settings>Player on the bottom left, change the view mode to Advanced.
Go to Video and click on the Processing tab. Turn off Hardware Acceleration.
That should optimize the performance of the addon otherwise check your internet connection speed.
